
Ombre lips have become a captivating beauty trend that blends two or more lipstick shades to create a stunning gradient effect. This technique not only adds volume and dimension to your lips but also allows for creative expression through color. Perfect for any occasion, ombre lips can transition from a subtle day look to a bold evening style with ease. In this comprehensive guide, we’ll walk you through the fun and easy steps to achieve the perfect ombre lips, using quality products like Milani powders and ColourPop cosmetics.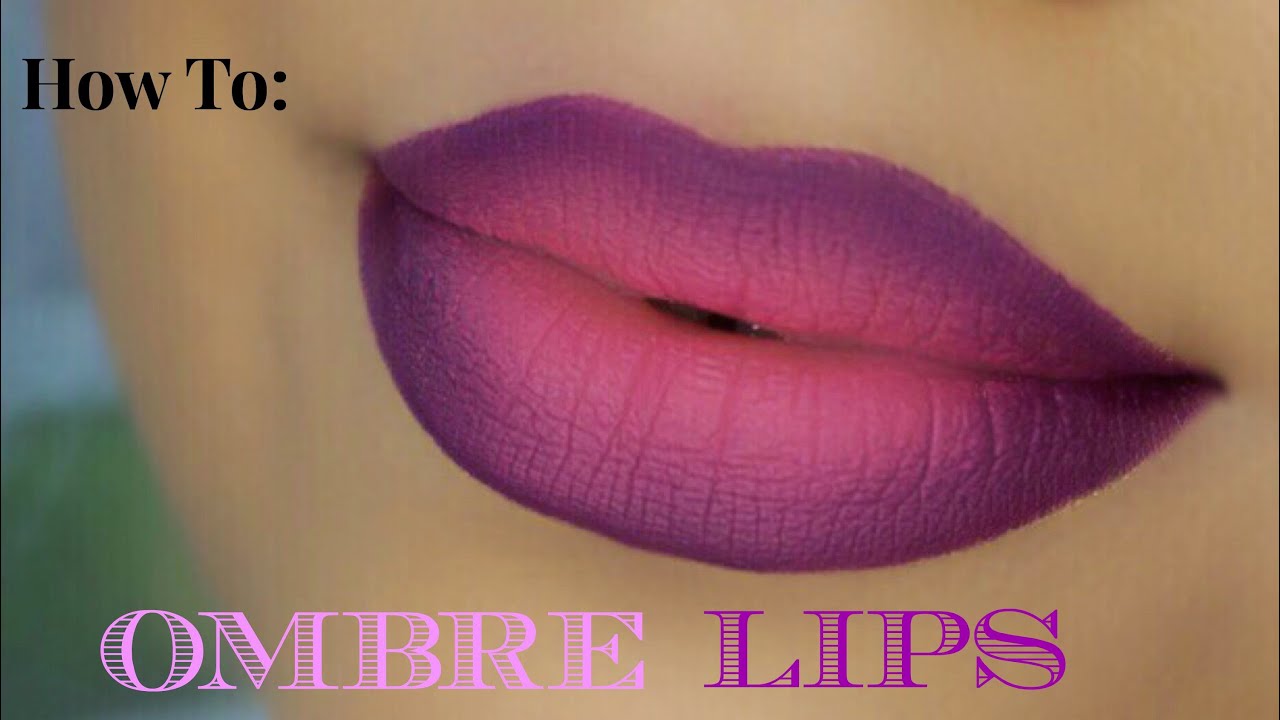
Step-by-Step Ombre Lips
Step 1: Prepare Your Canvas
Begin with a clean base. Apply a light to medium powder, such as Milani’s setting powder, lightly over your lips. This step ensures a smooth surface by neutralizing your natural lip color, making the ombre effect more pronounced and long-lasting.
Step 2: Hydrate Your Lips
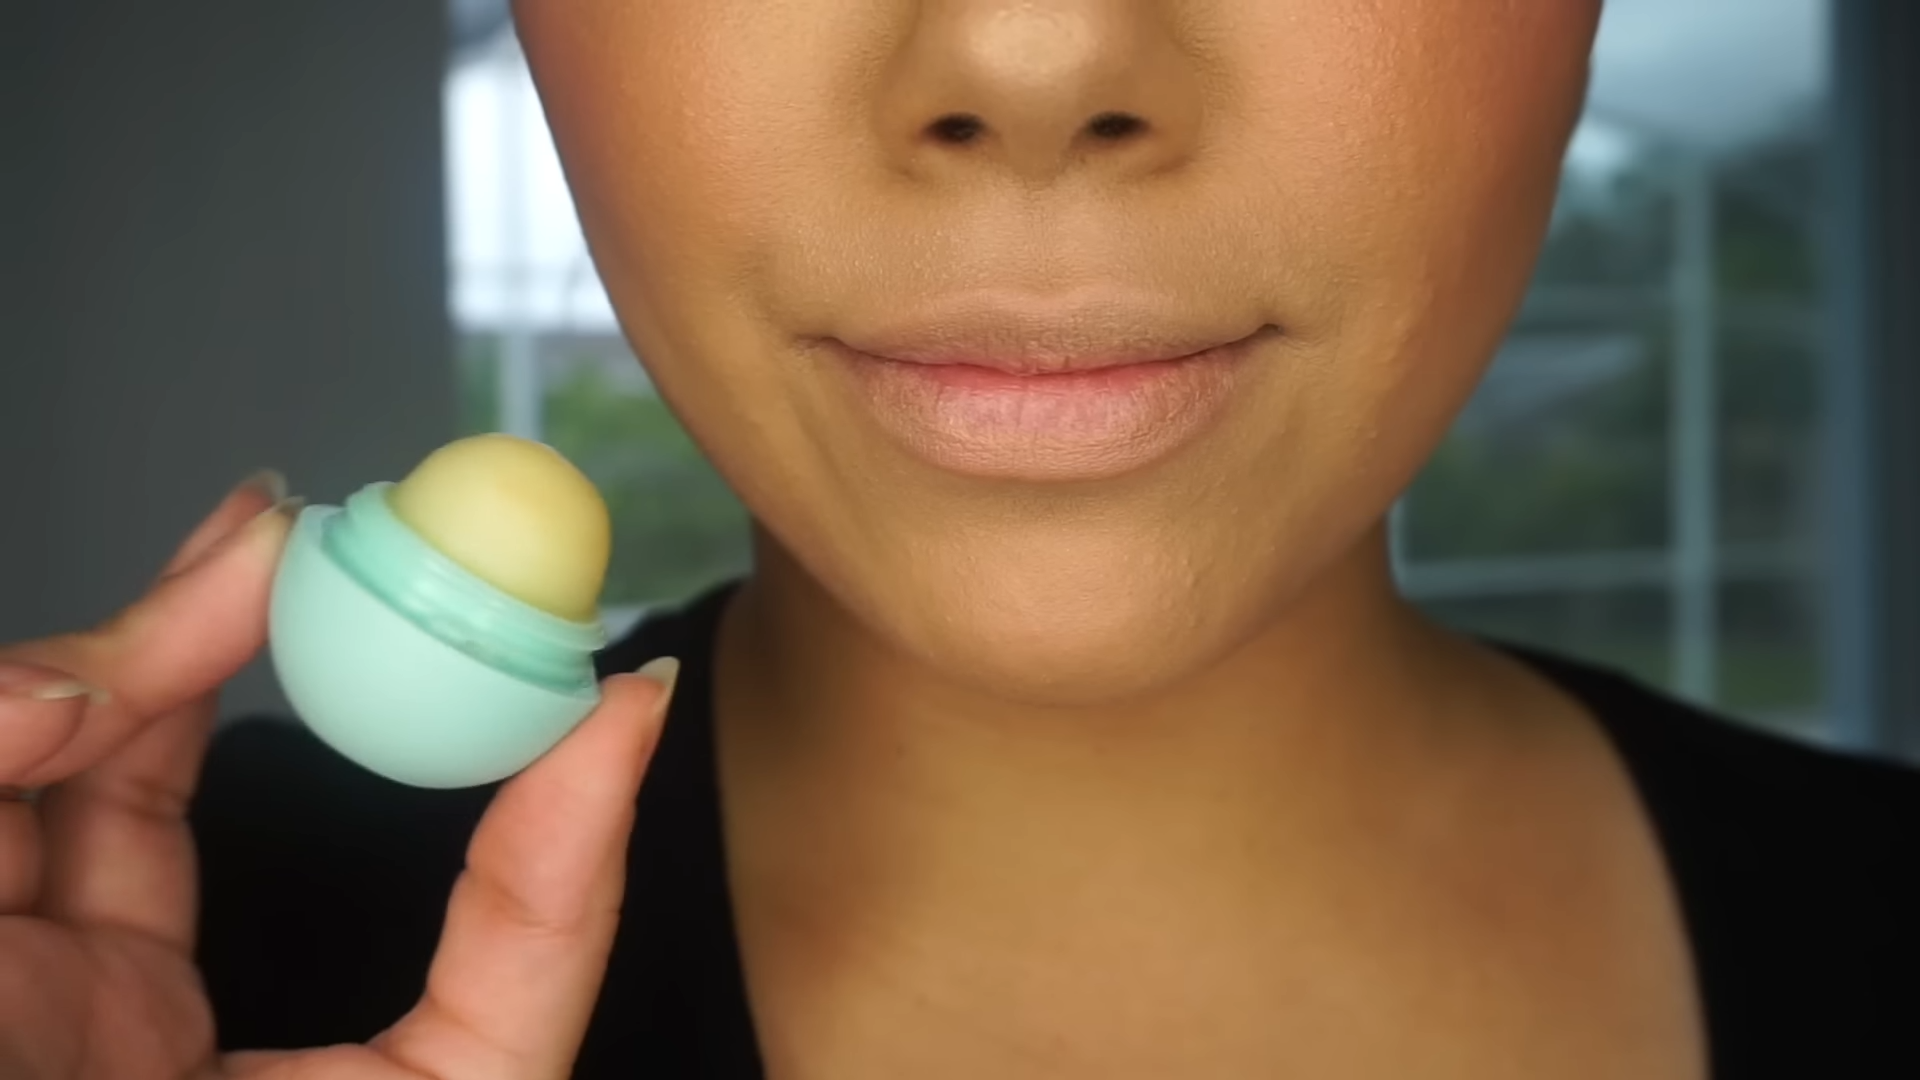
Hydration is key to preventing cracked or uneven lipstick application. Apply your favorite lip balm generously. This not only moisturizes but also helps the subsequent products glide on effortlessly.
Step 3: Outline with Precision
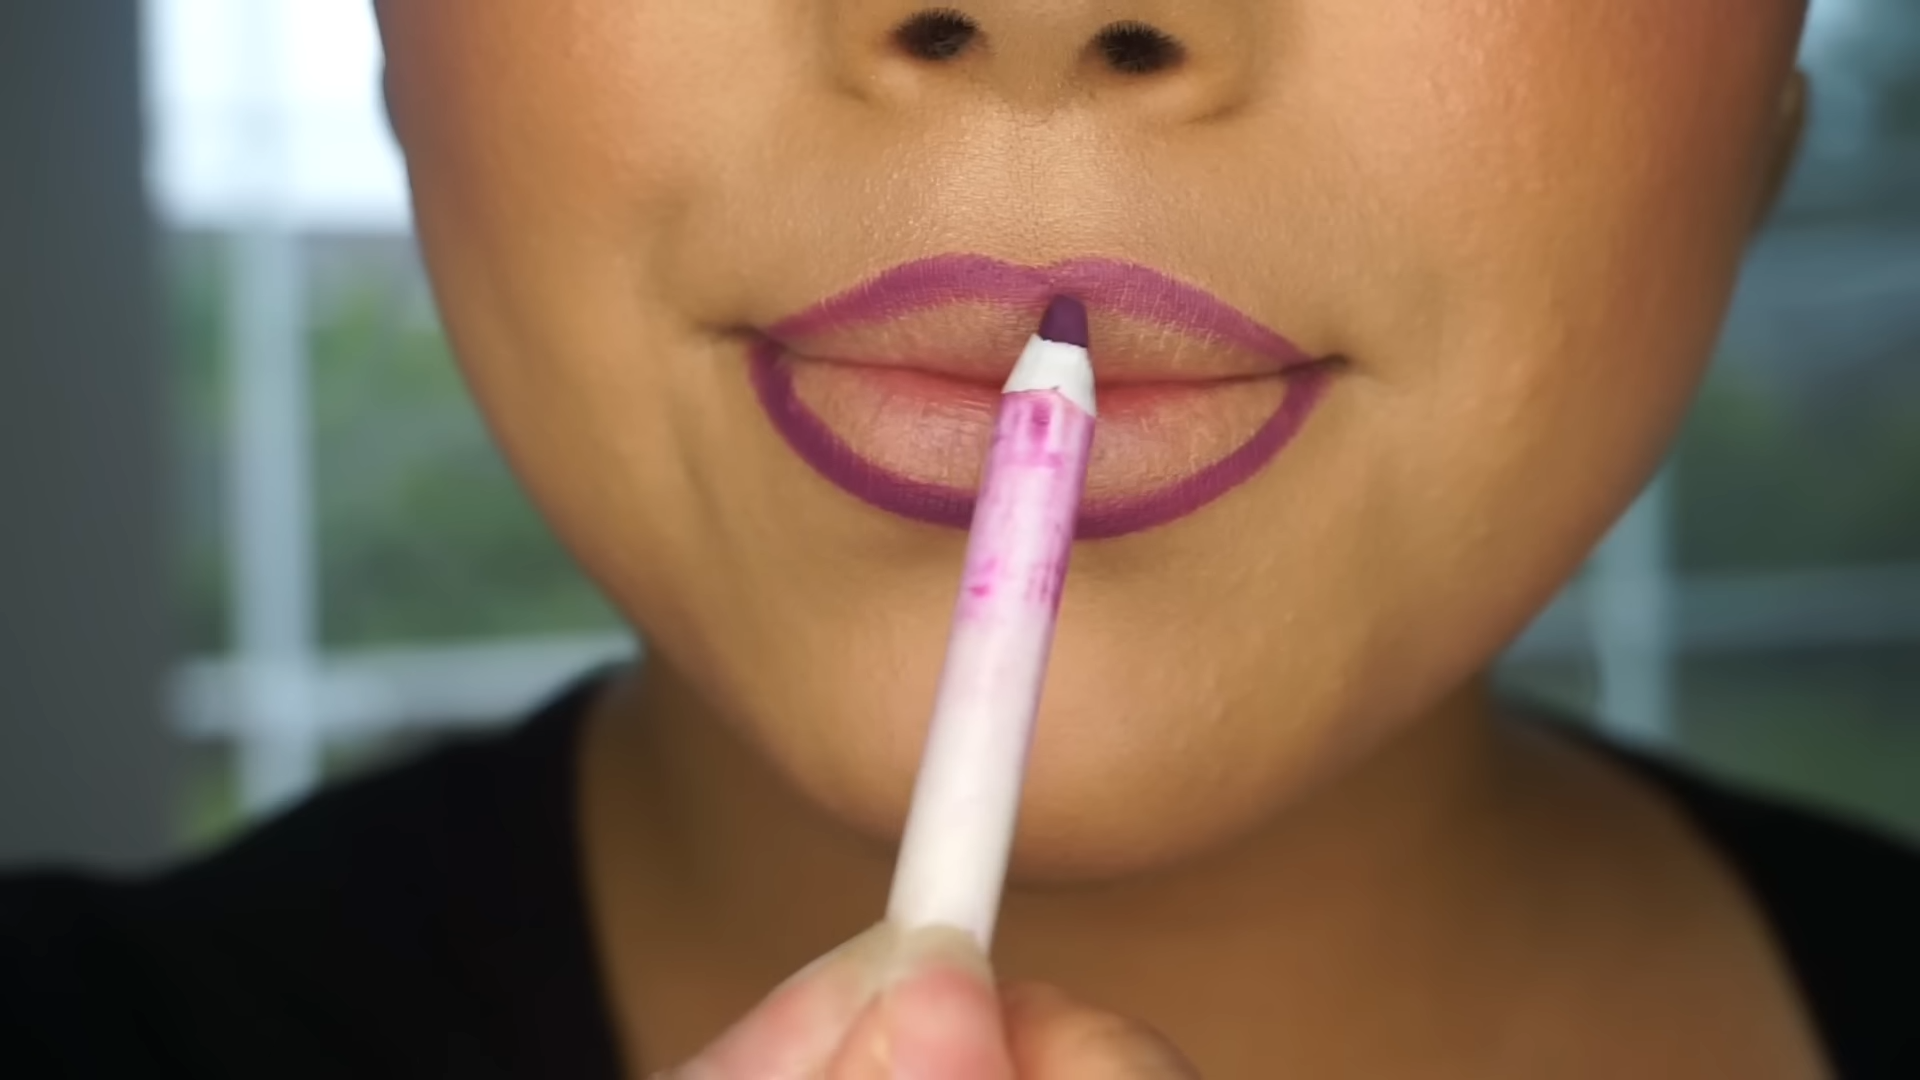
Choose a Color Pop lip liner in the shade “Leather” for outlining. Start with your bottom lip, carefully drawing along the edge. Then, move to the Cupid’s bow and the rest of the top lip, creating a precise boundary for your ombre effect.
Step 4: Blend the Edges
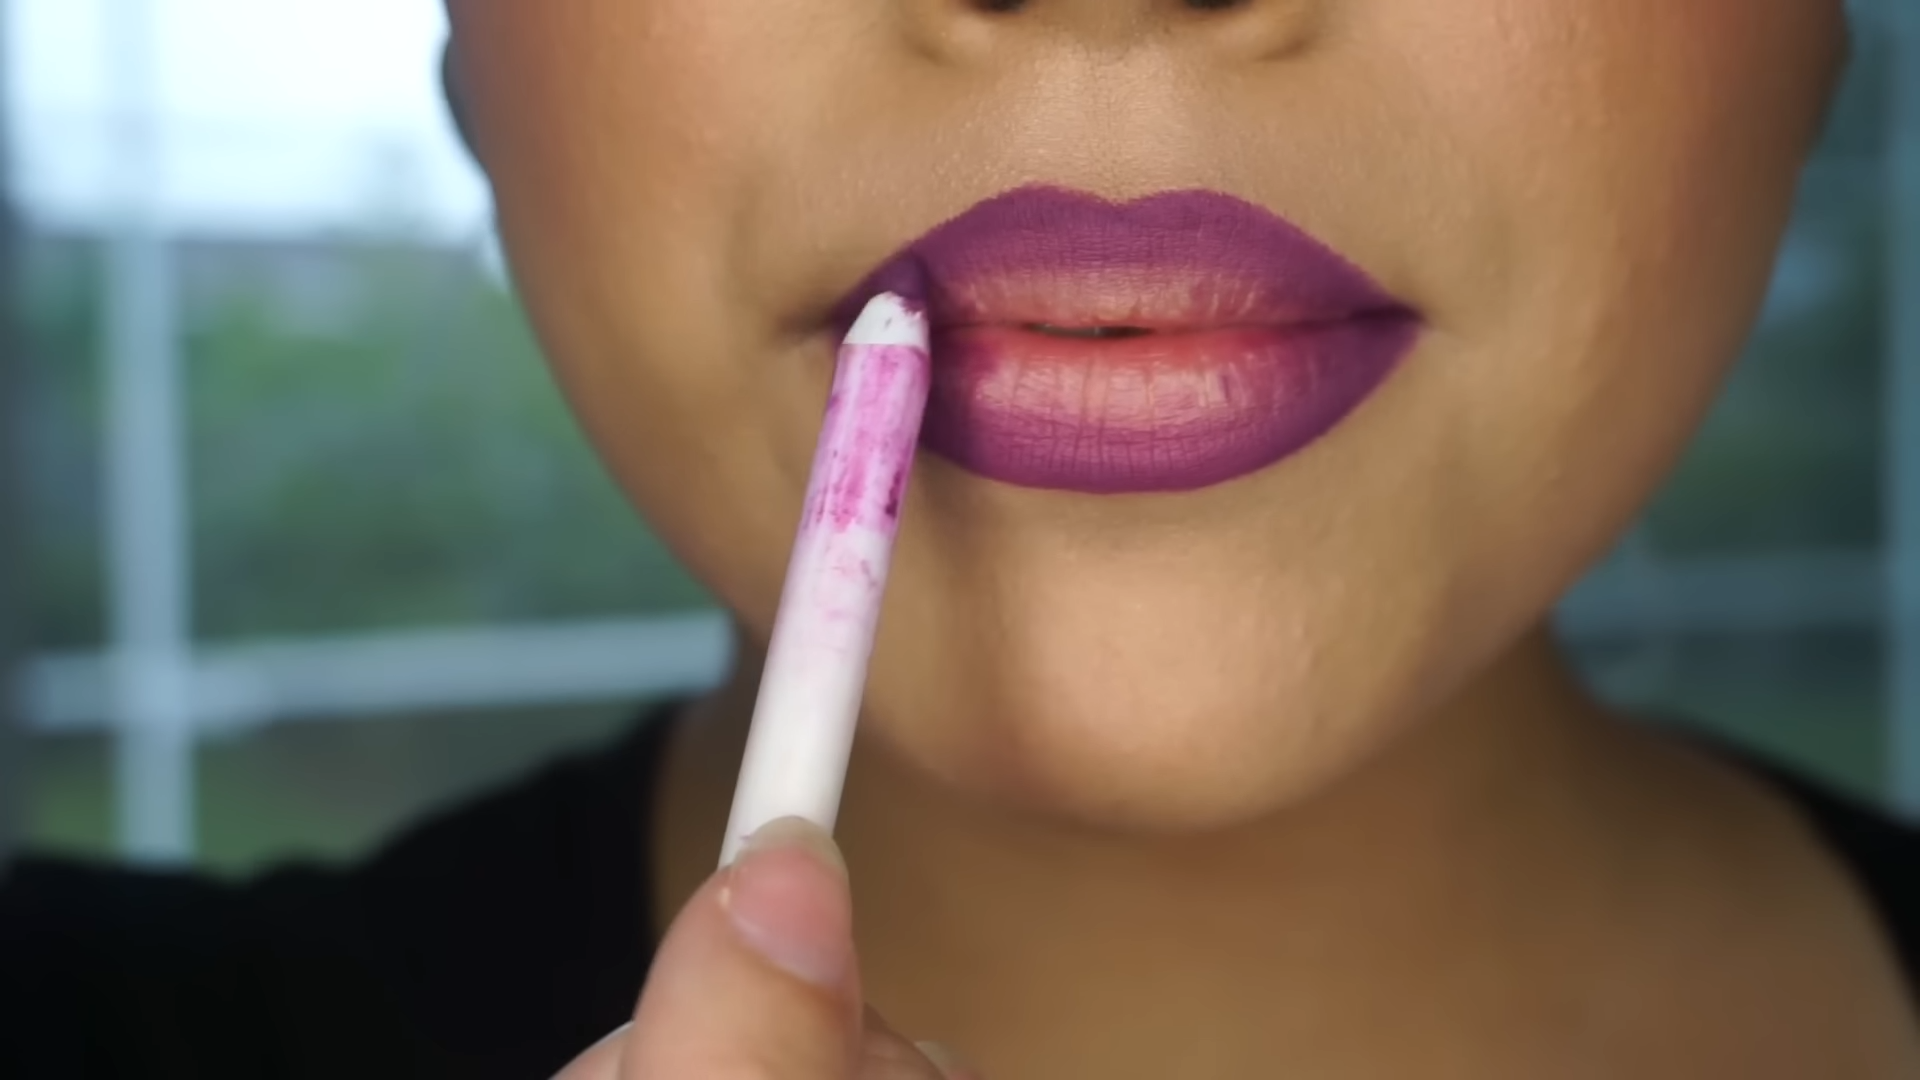
With the same lip liner, fill in the corners and edges of your lips. This step doesn’t need to be perfect but aim for a soft gradient by gently blending the liner towards the center. Press your lips together to help blend the color seamlessly.
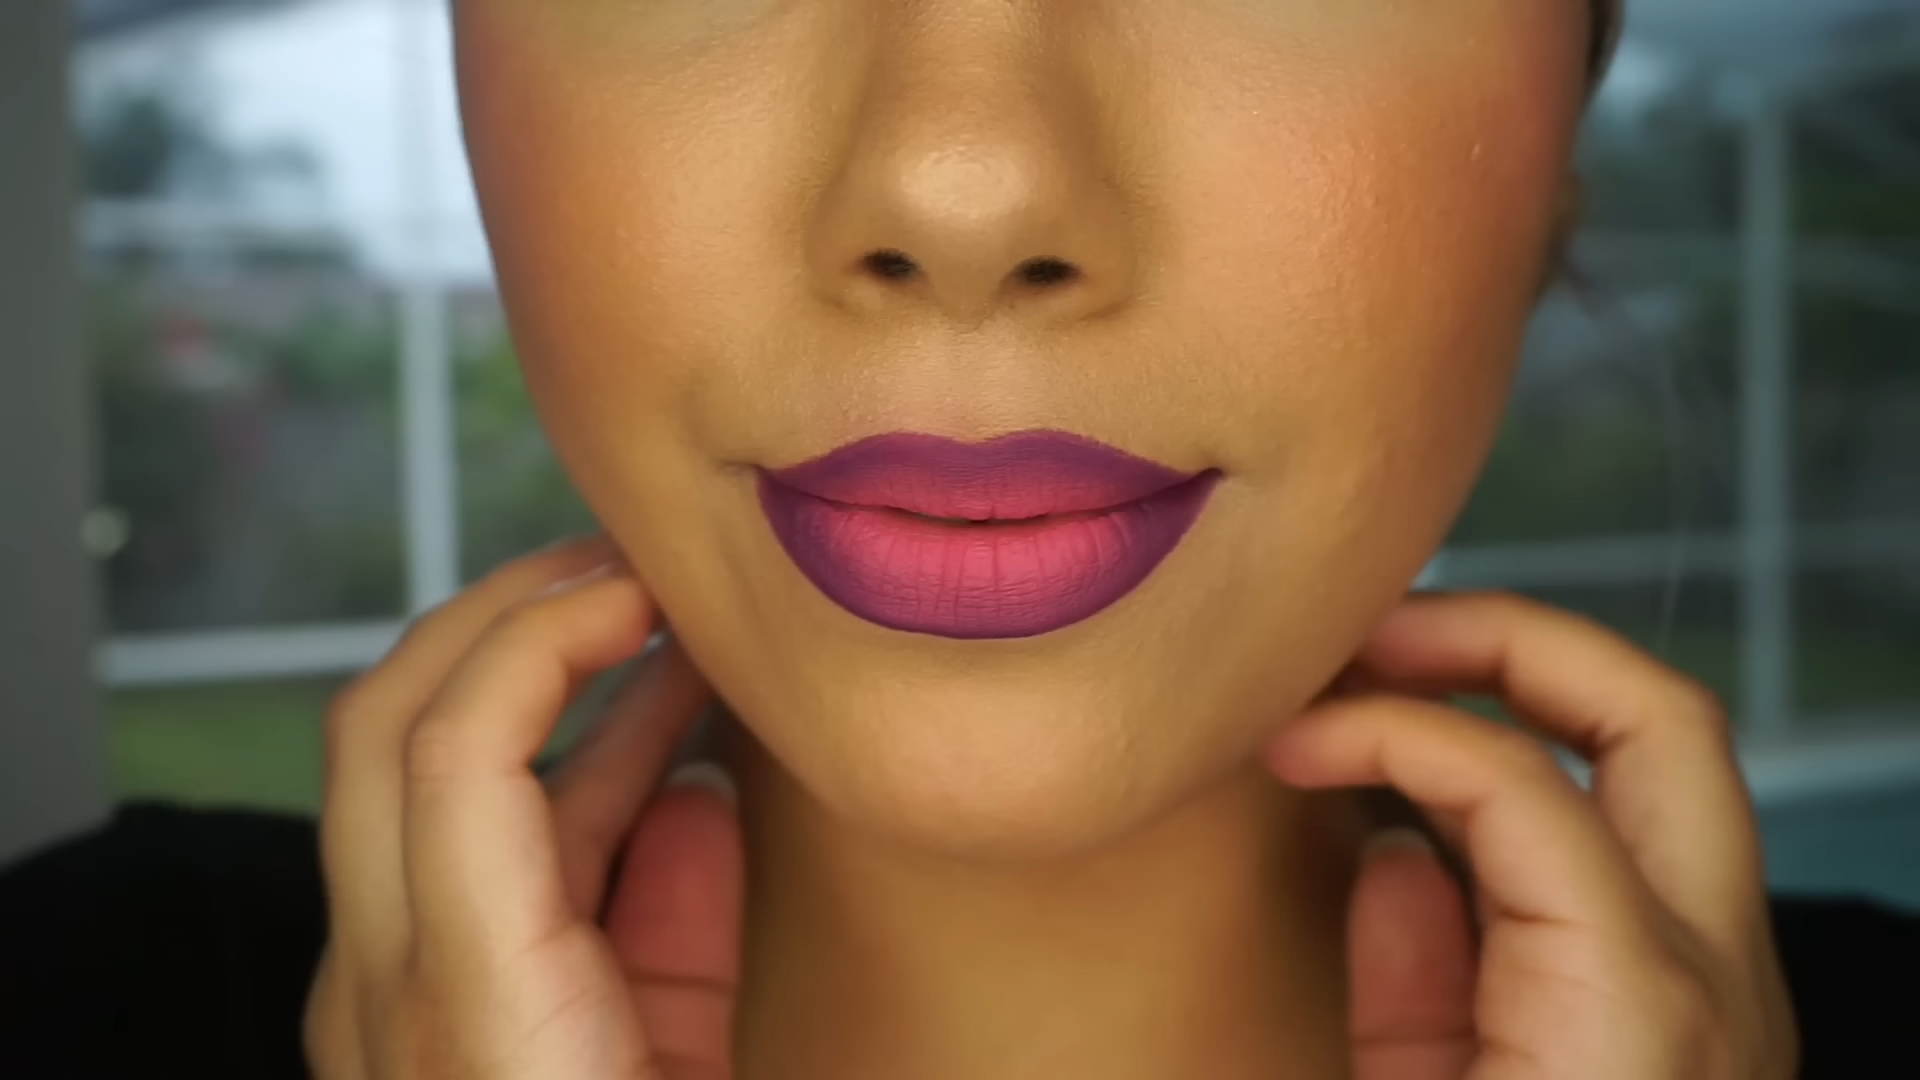
Step 5: Apply the Base Color
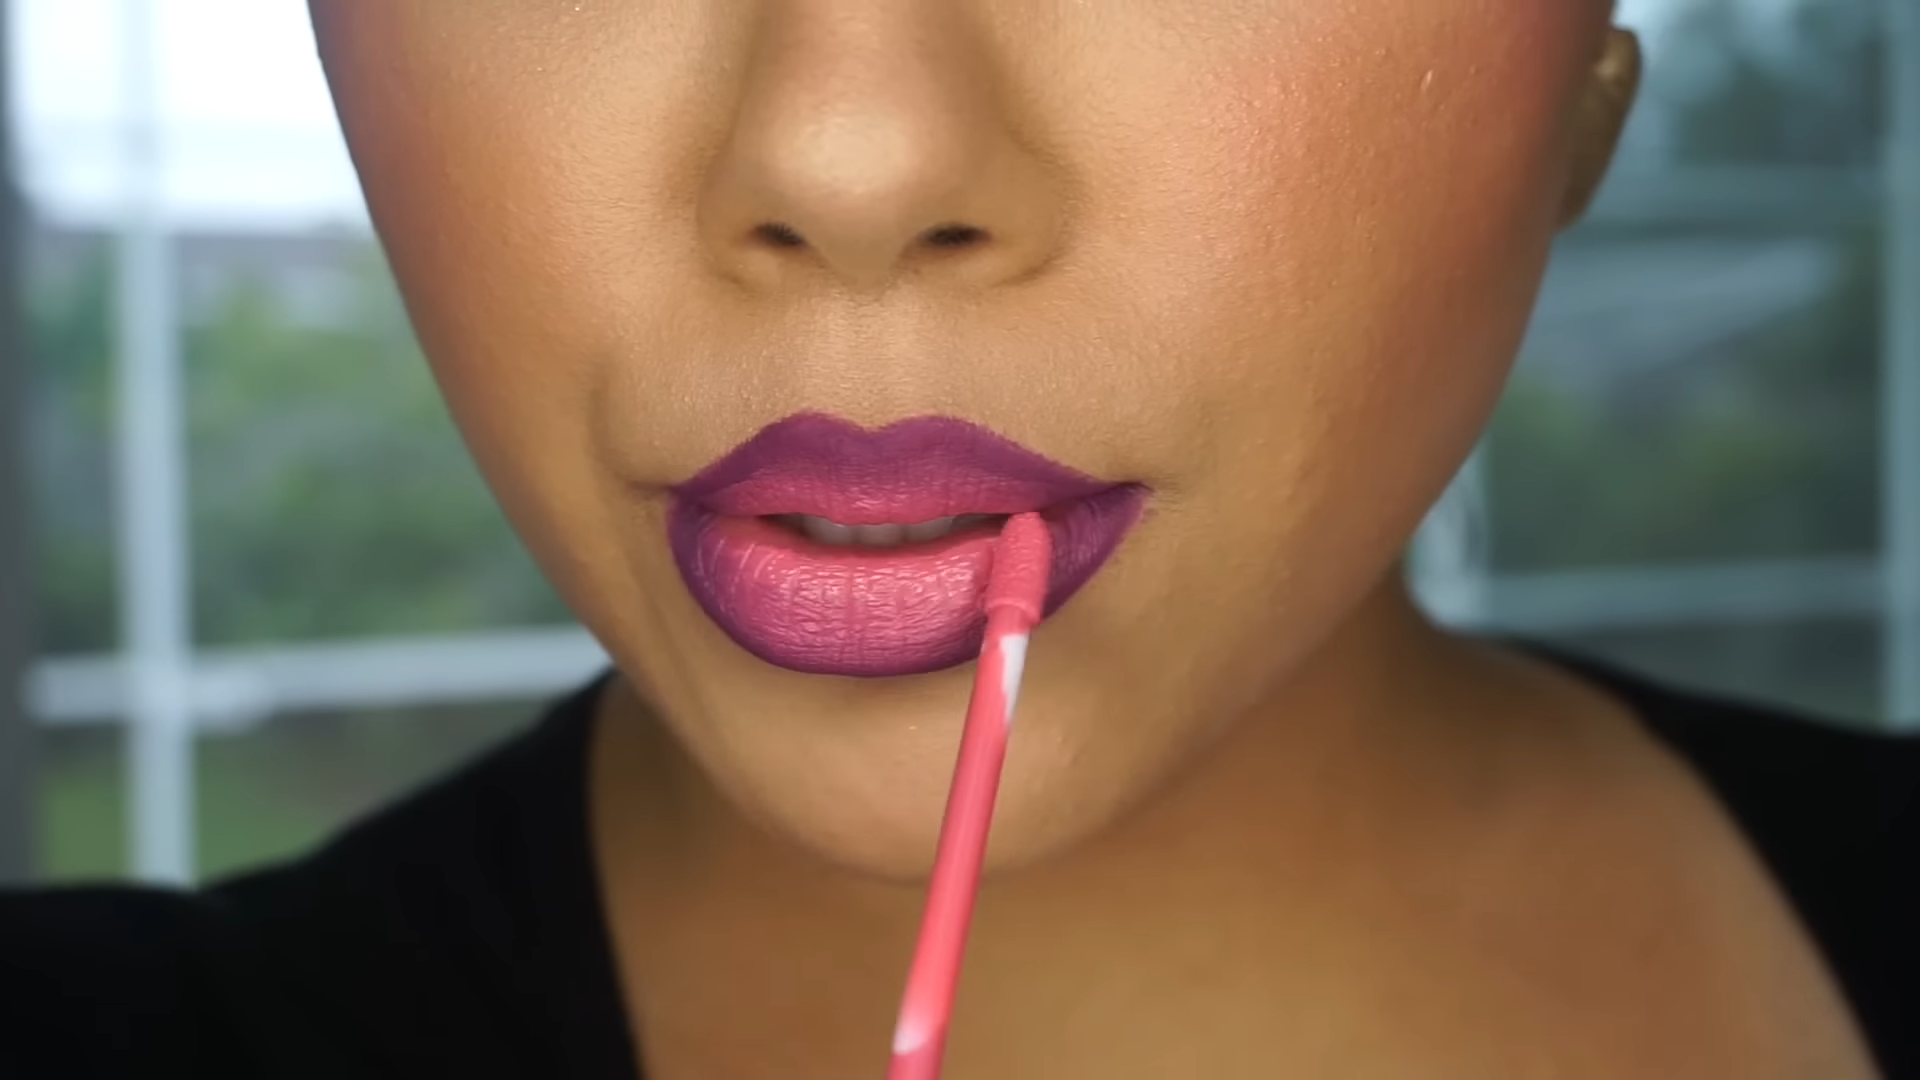
The central hue of your ombre lips comes next. Apply ColourPop Ultra Matte Liquid Lipstick in “First Base” to the center of both lips and the Cupid’s bow. This lighter, central color is what will create the ombre effect, offering a beautiful contrast to the darker liner.
Step 6: Blend for the Ombre Effect
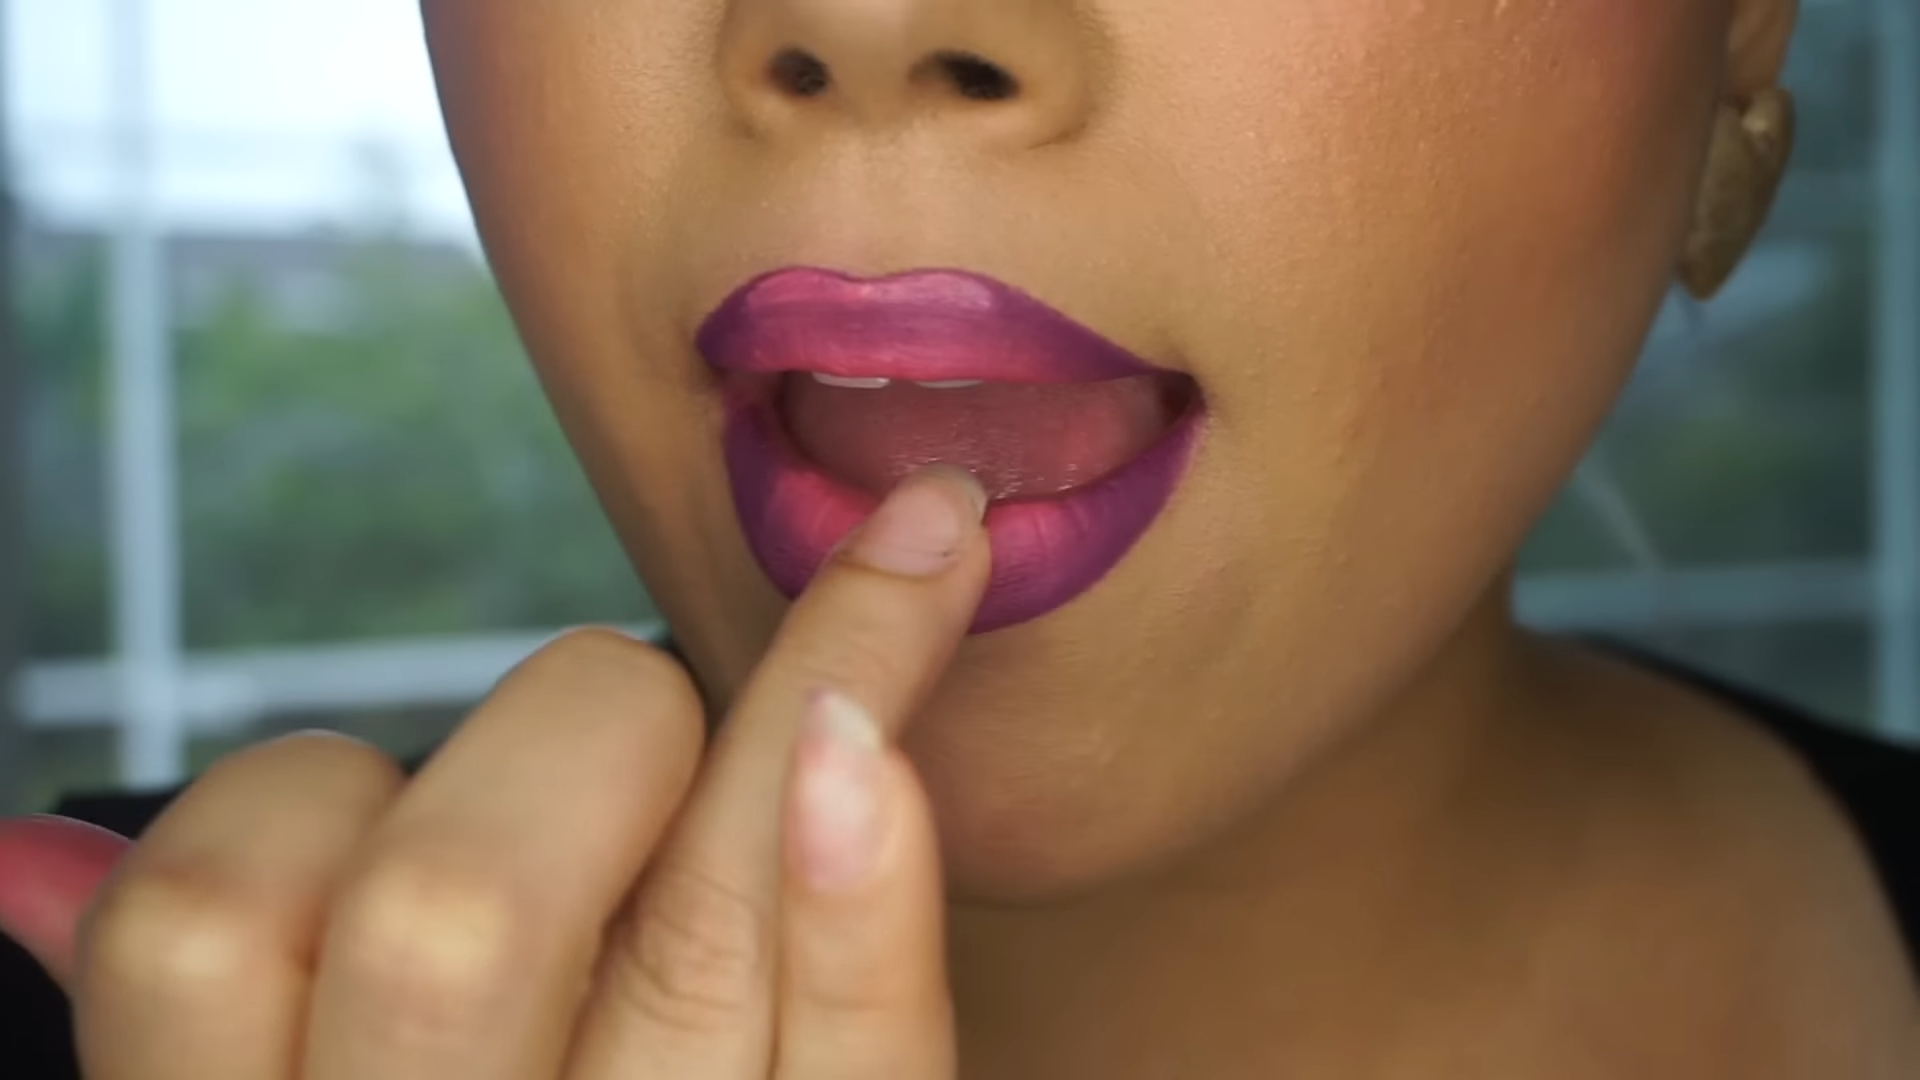
Now, blend the edges of the lip liner with the central lipstick using a lip brush or your fingertip. The goal is a smooth transition from the darker perimeter to the lighter center, without any harsh lines.
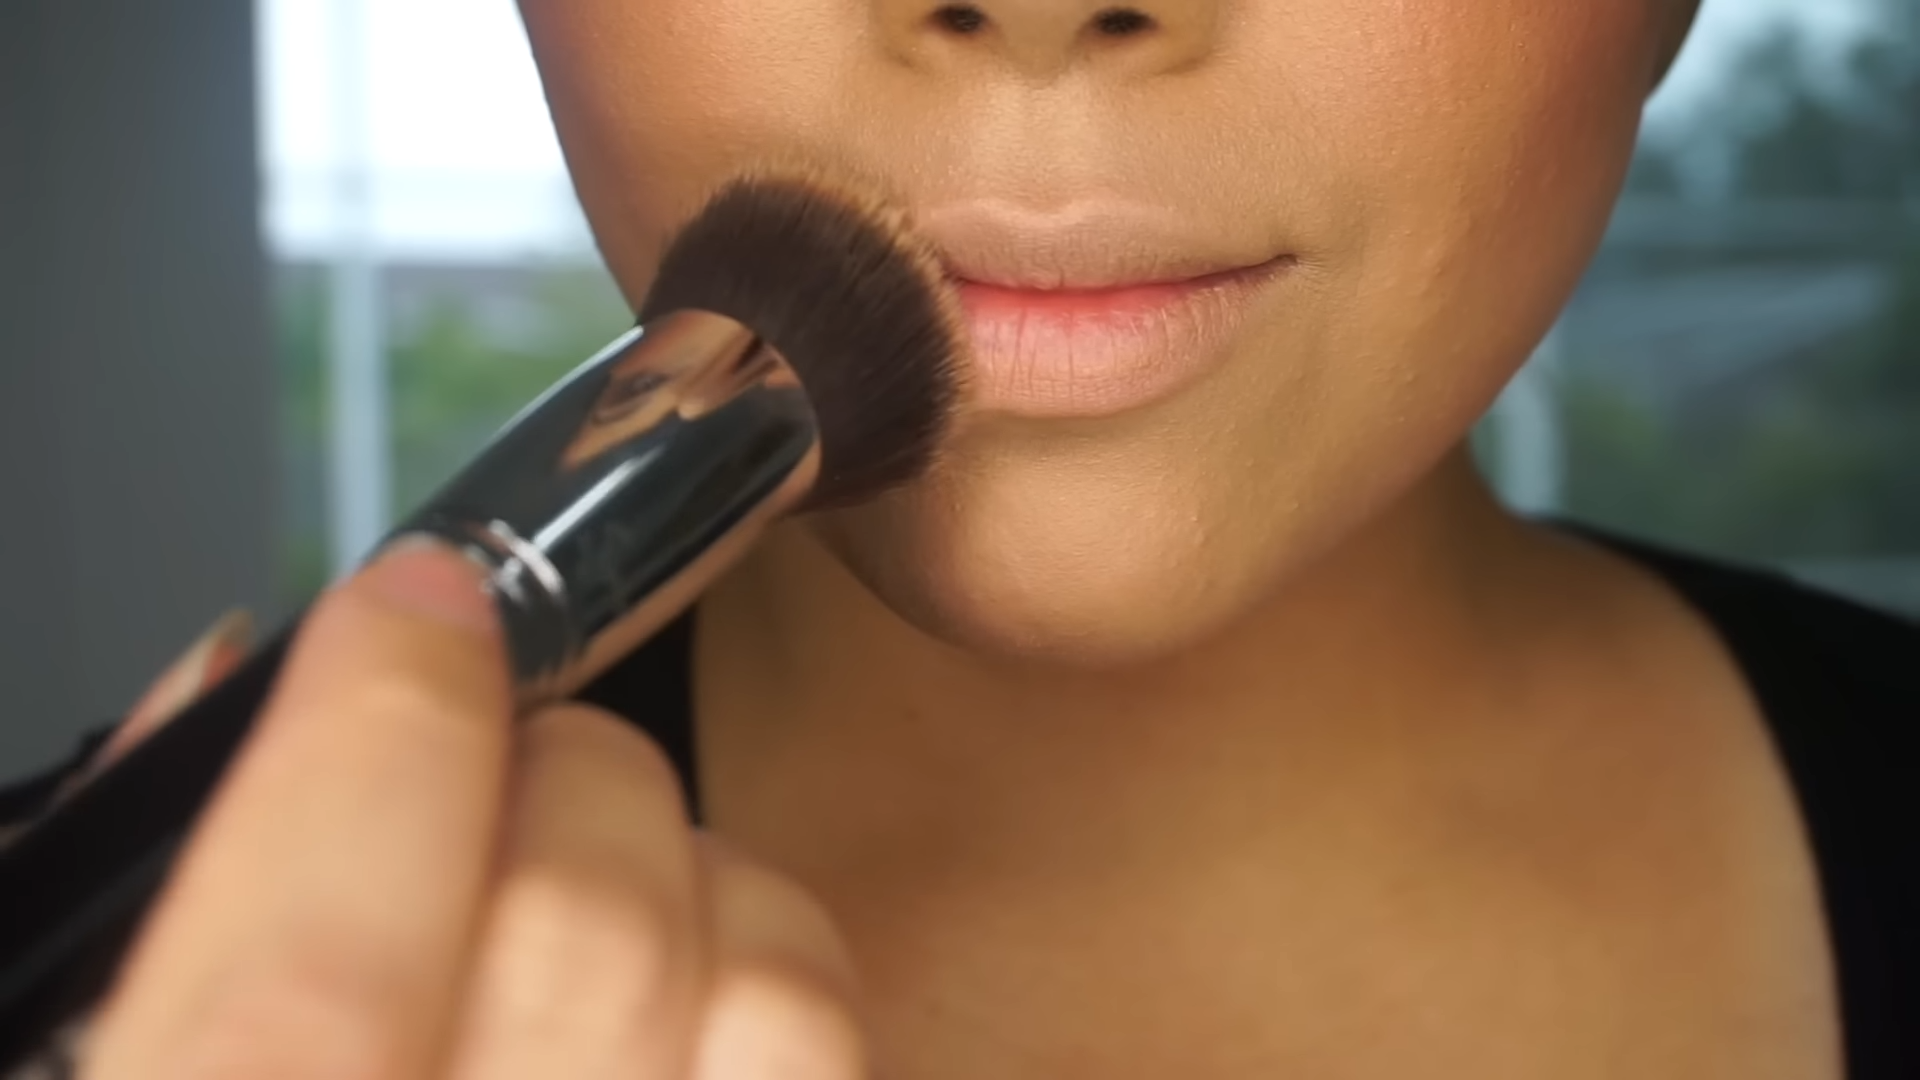
Step 7: Clean and Define
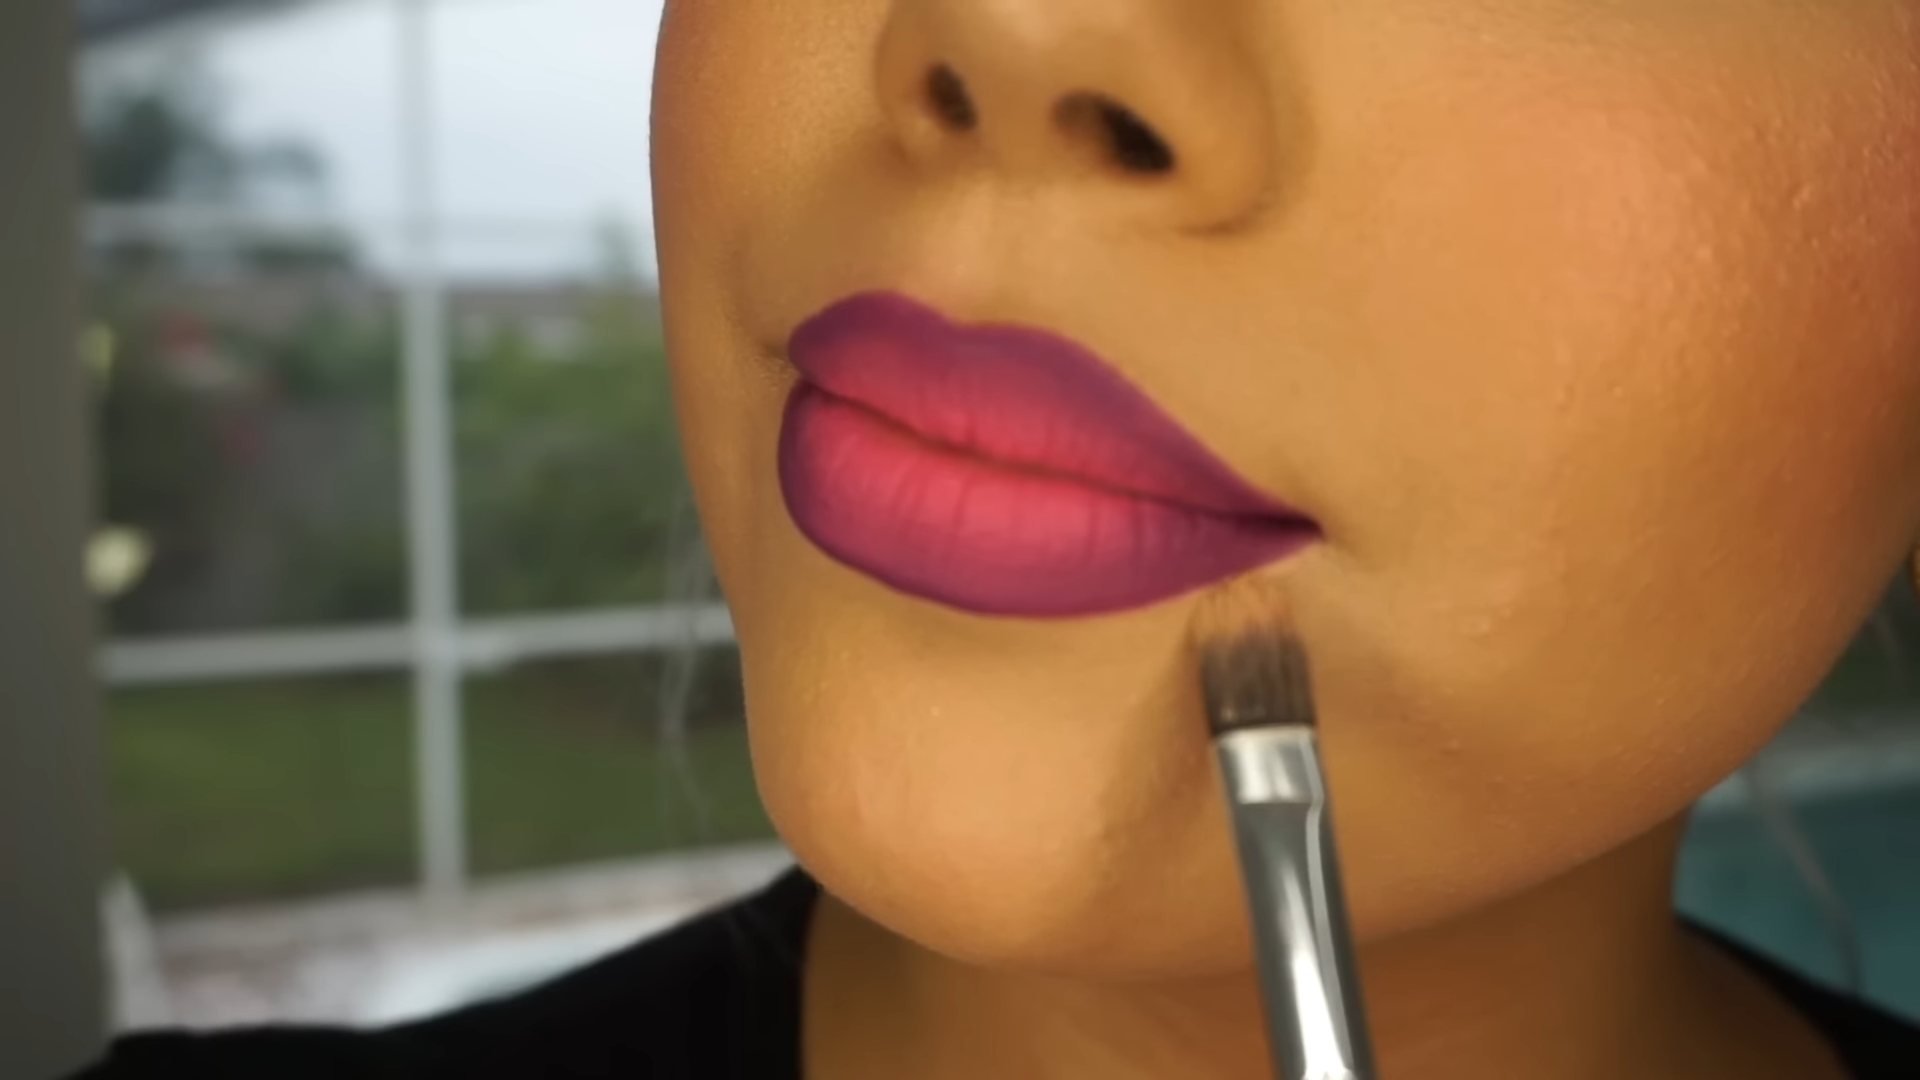
For a polished look, clean up the edges with a small brush dipped in concealer. This will correct any smudges and sharpen the contours of your ombre lips, ensuring a neat and professional finish.
Step 8: Final Touches
Evaluate your masterpiece and make any necessary adjustments. Perhaps add a bit more lipstick in the center for a plumper look or blend the edges further for a more natural gradient.
Achieving fun and easy ombre lips is within your reach with the right technique and products. This step-by-step tutorial is designed to guide you through each stage, from preparation to the finishing touches, ensuring a stunning result. Whether you’re aiming for a subtle effect for daily wear or a dramatic look for an evening out, ombre lips are a versatile and fashionable choice. Remember, the key to perfect ombre lips lies in blending—so let your creativity flow and blend away!