
Do you have a moment on TikTok where you fixate on Dutch braid videos, not knowing what to do? A year ago, you could have found me sitting on the floor of my bathroom, with a brush in one hand and my phone in the other and I had no idea what to do. I wished for a slick, nicely done look — yet my braids rarely turned out neatly. Sound familiar?
If you learn the Dutch braid step by step as advice from an expert, you’ll find it is easy and becomes a habit. If you’re braiding your hair for working out, a wedding or just the workweek, this guide will help you get from being clueless to knowing what you’re doing — with insightful stories, expert advice and lessons learned.
This tutorial is perfect for:
-
- Anyone new to braiding
- Moms styling their kid’s hair
- Anyone who needs to look professional in just a few minutes
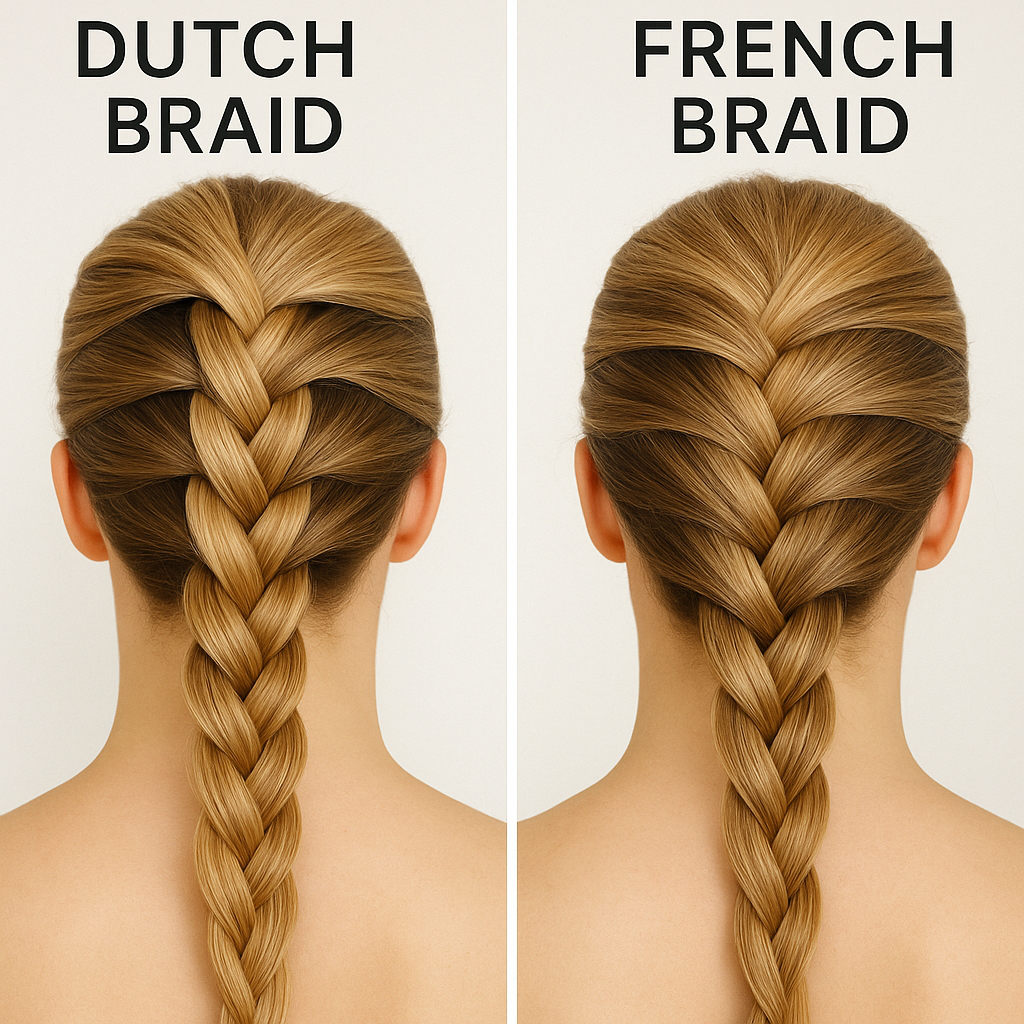
What Is a Dutch Braid?
Unlike with a French braid, when making a Dutch braid the outer sections pass underneath the middle. This makes everything appear raised and defined, even though the process is easy after you learn how to do it.
A braid is visible on any hair type and appears best against your natural scalp. Whether you’re being active, going on a date or want a comfortable hairstyle, this style fits the bill.
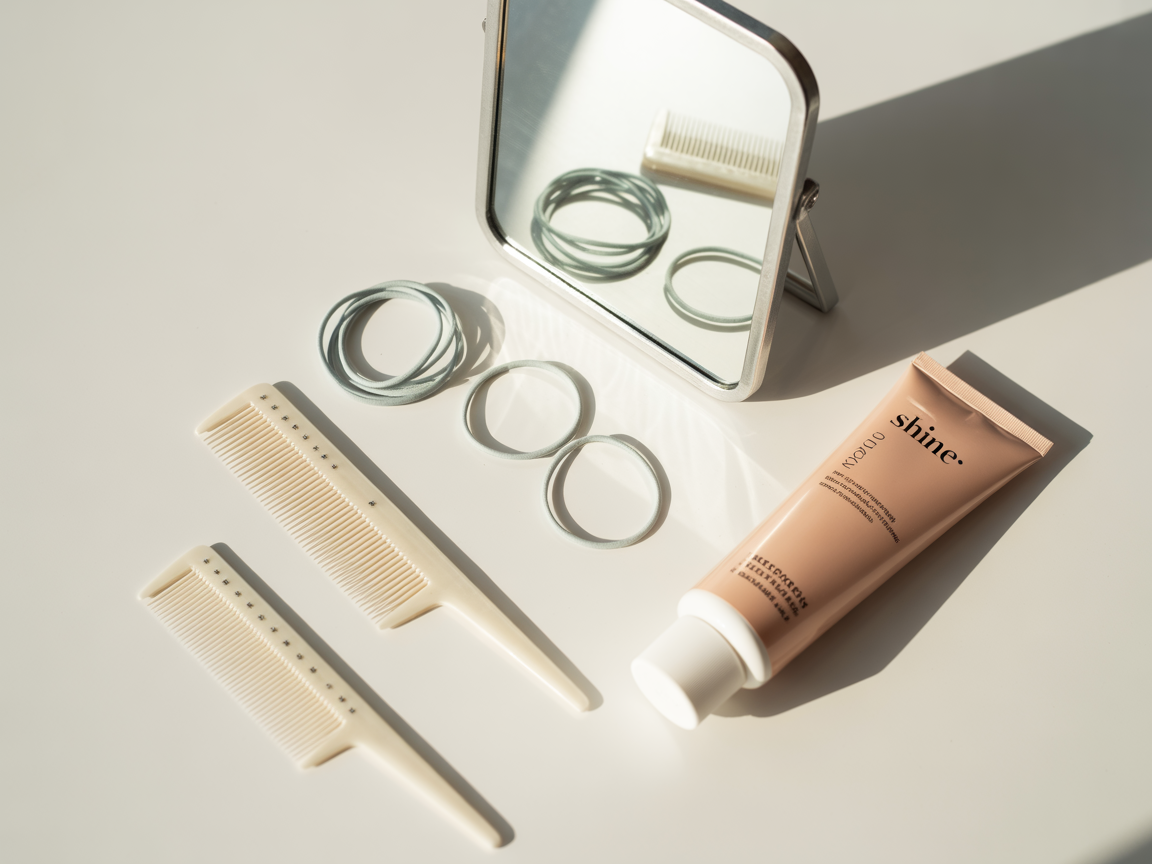
What You’ll Need
Before you get started, make sure you’ve got your tools ready. Here’s what I use every time:
- Wide-tooth comb for detangling
- Tail comb for clean parting
- Elastic hair ties (the small, clear kind are my favorite)
- Styling cream or mousse for hold
- Hairspray or serum to finish
- Mirror — and if you’re just starting out, grab a second one to check the back
How to Dutch Braid Step by Step
1. Detangle and Prep Your Hair
Start with clean, dry, or slightly damp hair. Use a wide-tooth comb to gently detangle from ends to roots. I like applying a bit of mousse or smoothing cream — it helps control flyaways and gives the braid structure.
2. Section the Hair
Using the tail comb, part your hair in the middle or to the side — whatever look you’re going for. Then take a triangle section at the top of your head and divide it into three equal strands.

3. Begin the Braid
This is where the magic starts! Take the left section and cross it under the middle. Then the right under the new middle. Repeat once to get the pattern going — left under middle, right under middle.
4. Add Hair Gradually
As you continue, add a small piece of loose hair to the left strand before crossing it under the middle. Do the same on the right. Keep your sections tight and close to the scalp for a neat look.
5. Keep Braiding Down the Length
This is where I used to panic. I’d start strong, then halfway down, the braid would loosen or drift sideways. My tip: pause every few crosses to check your tension. And don’t worry if it’s not perfect — mine weren’t either for the first few months!
6. Secure the End
Once you run out of hair to add, just continue a basic three-strand braid down the length and tie it off with a clear elastic. I like to leave a couple of inches at the bottom for a soft finish.
7. Pancake the Braid (Optional)
To make your braid look fuller, gently tug on the outer edges of each braid loop. This technique, called “pancaking,” adds volume and a slightly undone, boho vibe. I usually skip this on gym days but love it for brunch or casual outings.
8. Finish with Styling
Set everything in place with hairspray or add a touch of serum for shine. Sometimes I wrap a tiny strand of hair around the elastic and pin it underneath — a cute little finishing touch that hides the tie.
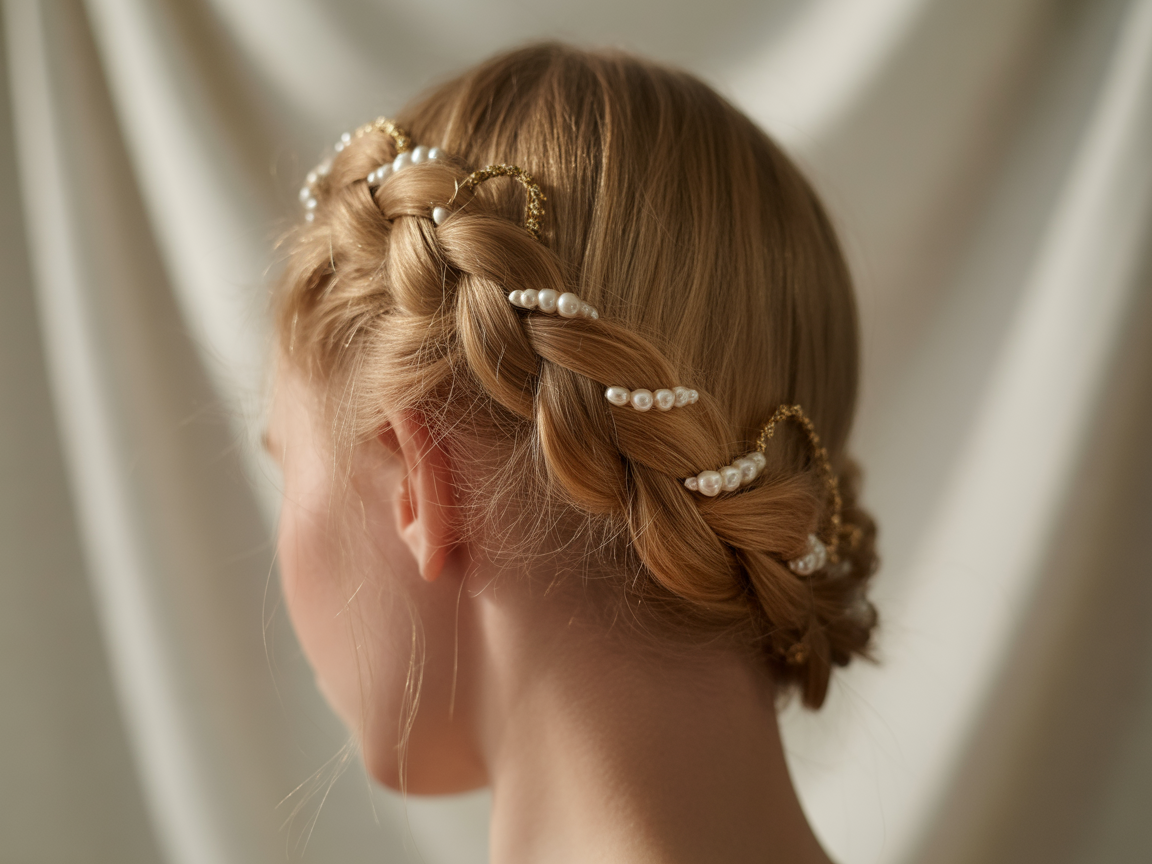
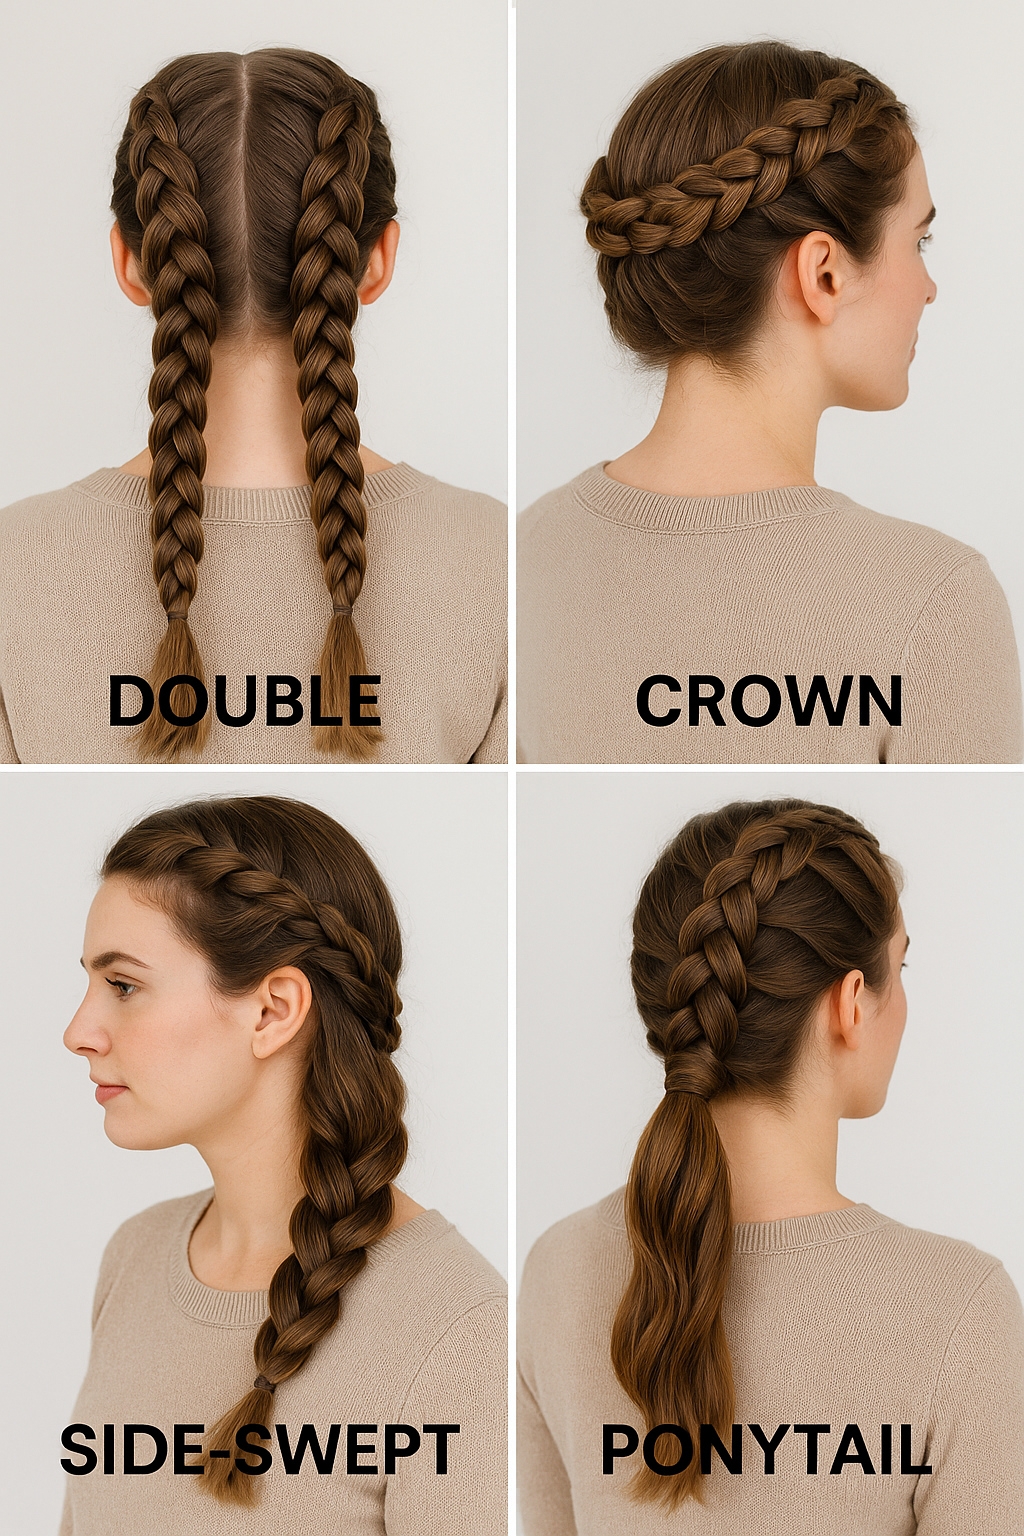
Dutch Braid Variations You Can Try
Once you’ve got the basics down, there are so many ways to remix the look! Here are a few of my favorites:
- Double Dutch Braids: Split your hair down the middle and create two parallel braids for a sporty look.
- Dutch Crown Braid: Wrap your braid around your head like a halo — great for weddings or festivals.
- Side-Swept Dutch Braid: Start at one temple and braid across diagonally for a romantic, asymmetrical style.
- Dutch Braid into Ponytail: Stop the braid mid-way and gather the rest into a pony — perfect for busy mornings.
Last summer during a beach trip, my sister and I tried matching double Dutch braids. They held up through sand, wind, and salty air — and looked amazing in every photo. Highly recommend!
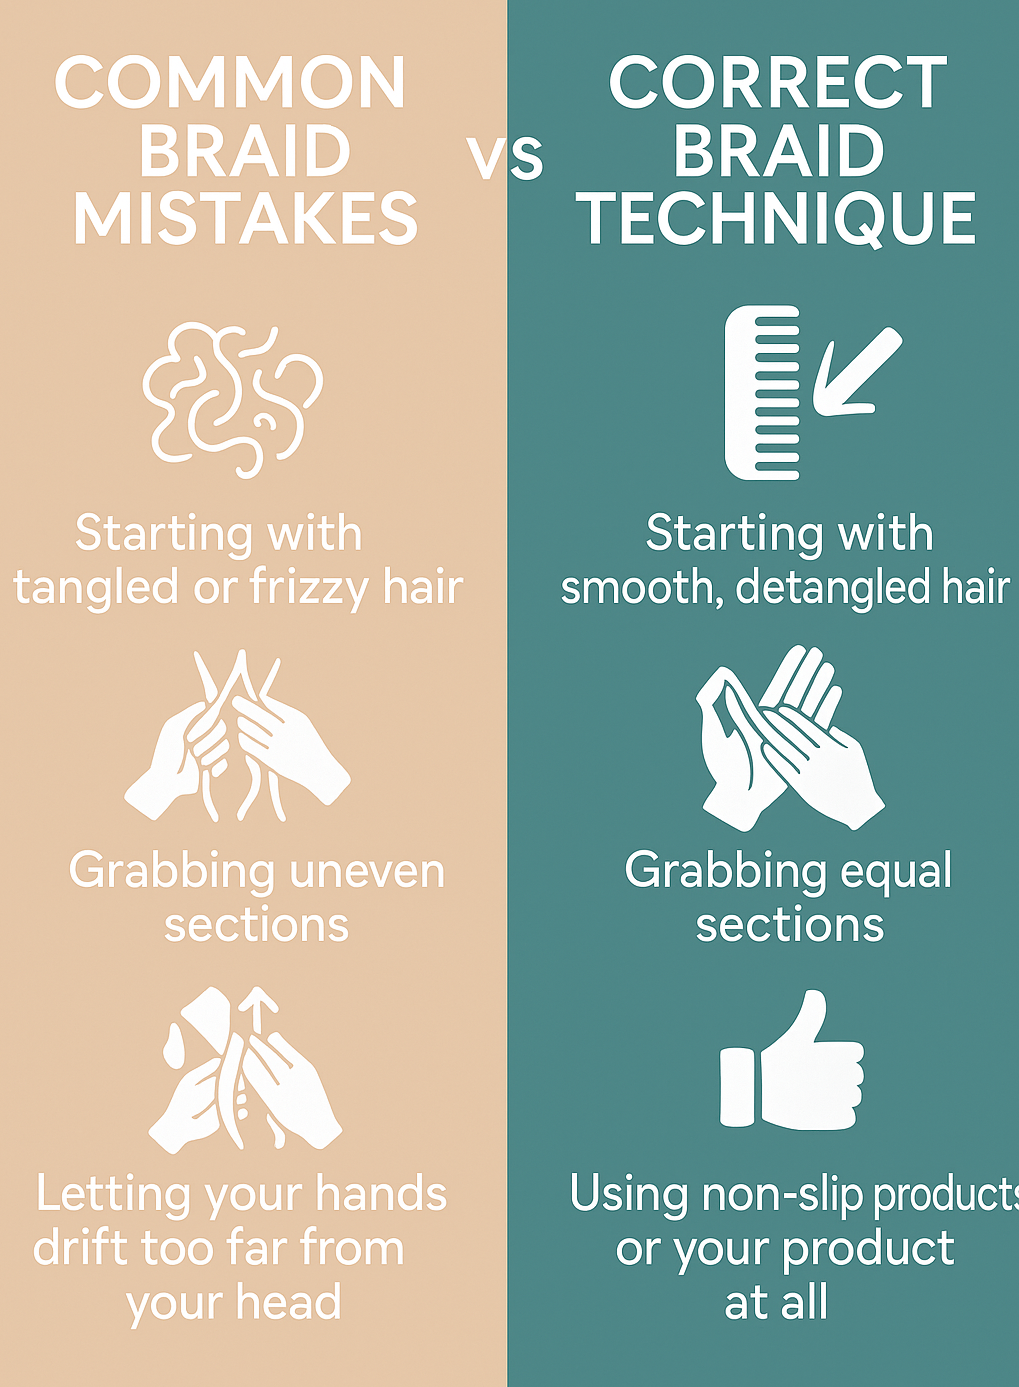
Common Mistakes to Avoid
Don’t stress if it’s not perfect the first few times. Here are five common missteps to watch out for — I’ve made all of them:
- Starting with tangled or frizzy hair
- Grabbing uneven sections
- Letting your hands drift too far from your head
- Using slippery products before braiding
- Quitting too soon! Practice really is everything.
Quick Dutch Braid Reference Table
| Step | Tool Needed | Key Tip |
|---|---|---|
| Detangle | Wide-tooth comb | Start from ends, work up to avoid breakage |
| Part & Section | Tail comb | Use clean, straight partings for a neat look |
| Begin Braiding | Fingers | Keep hands close to the scalp for tightness |
| Secure End | Elastic tie | Wrap a hair strand over the elastic for polish |
| Finish | Hairspray or serum | Tame flyaways and add subtle shine |
Final Thoughts
Here’s what I’ve learned from years of braiding — and unbraiding — my own hair:
- Practice makes progress — not perfection
- Clean parting is 90% of a polished braid
- Confidence builds with every attempt
- Don’t be afraid to mess up — it’s just hair!
Have you tried a Dutch braid yet? What’s been your biggest challenge — parting, adding hair, or finishing the ends? I’d love to hear your story — let’s swap tips in the comments below!