
Has anyone with a smooth and classy French twist ever made you say, “No way, I couldn’t replicate that”? I used to think that, too. I thought you needed to be at a salon, with a main stylist and a few helpers, to attempt this look. However, only a few years ago, as I got ready for a dinner party during a trip to the beach, I used it and was surprised to find that it actually worked. That change I made really made a difference in my skin care.
In this post, I’ll take you through the steps needed to make a classic French twist that boosts your style. No matter if it’s a wedding, an interview or even a simple Tuesday, this guide will show you how to look your best.
Who Is This Guide For?
- Women with medium to long hair
- Beginners who want a no-fail updo
- Anyone looking for a timeless, classy hairstyle
- Bridesmaids, businesswomen, brunch lovers—basically, everyone

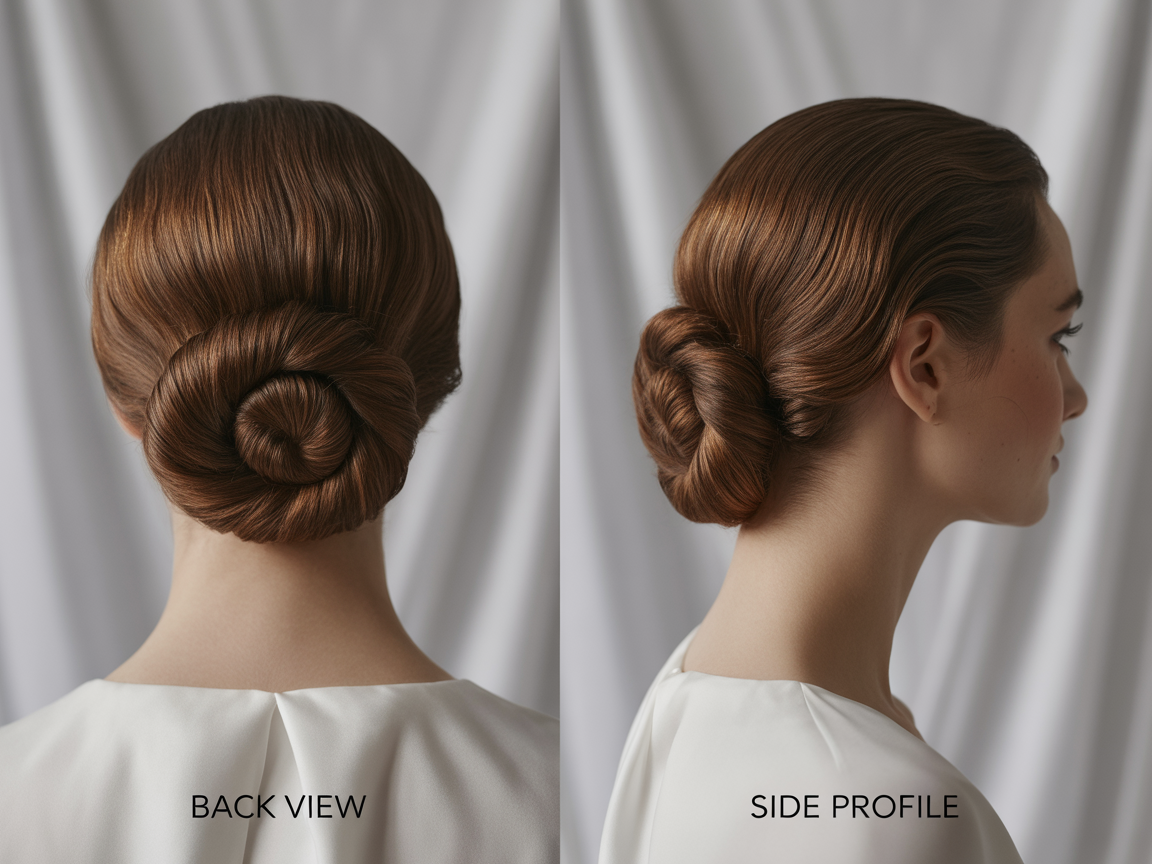
What Is a French Twist Hairstyle?
Many experts point out that the French twist which could also be called a chignon twist, originally has its start in Paris fashion. It’s that attractive amount of hair that often appears on red carpets or in old movies. It looks refined, structured, and honestly… a little intimidating.
Yet, don’t worry—knowing the technique makes it very simple. And the best part? Wild prints look good on almost every shape of face and suit most types of hair. You can make it seem you are all put together by low-effort planning.
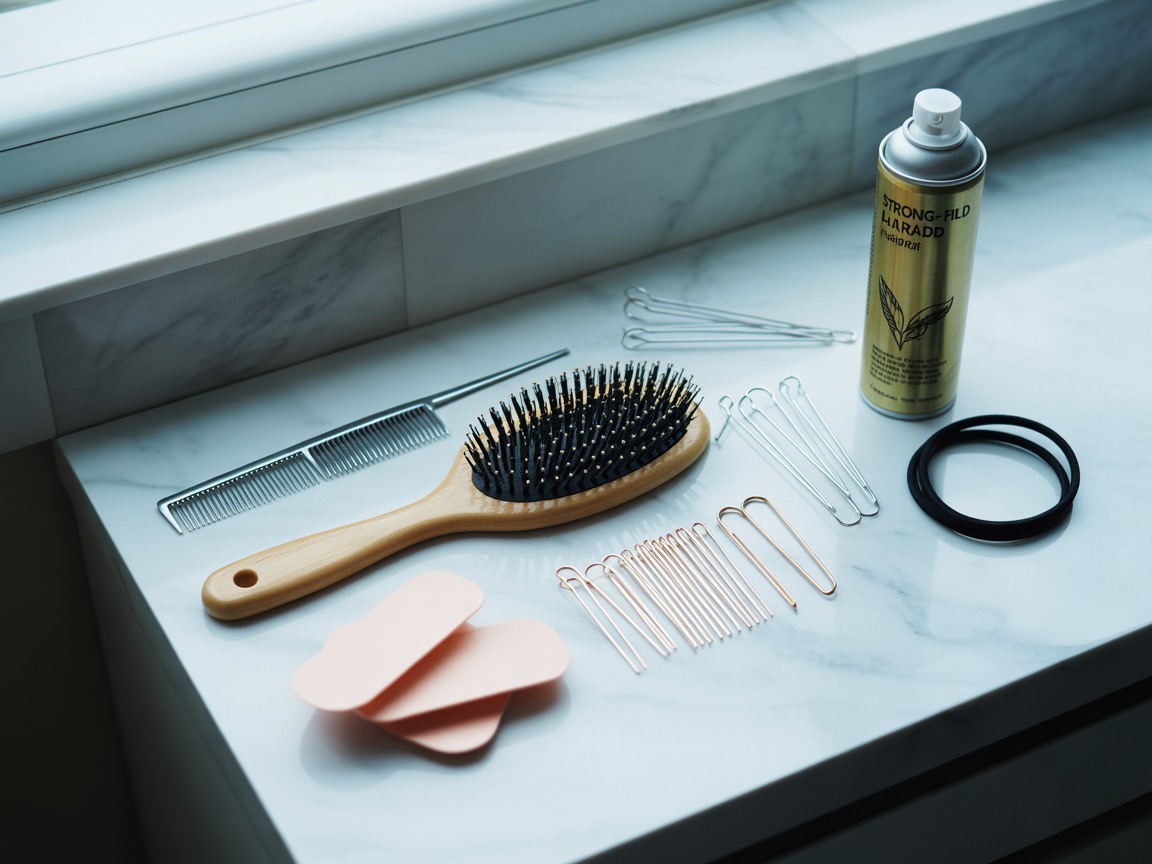
Tools and Products You’ll Need
Before we dive into the steps, let’s talk prep. Having the proper tools at home will really help you out!
1. Bobby Pins and U-shaped Hair Pins
Invest in high-quality pins that match your hair color. If they are not strong enough, your hair can’t stay in the styles you try.
2. Strong-Hold Hairspray
Your secret to having your twist neat and flyaways under control during the day or night.
3. Tail Comb and Boar Bristle Brush
The tail comb allows you to separate your locks and the brush gently detangles your strands with no flatness.
4. Hair Padding (Optional for Fine Hair)
To achieve that full-looking twist, add some padding if your hair starts to thin.
5. Elastic Band or Claw Clip (For Prep)
They are useful at the beginning of gathering your hair, while you are twisting it.
I took a trip to Chicago to see my sister, only to realize I didn’t bring my usual U-pins. I tied up my hair as best I could with bobby pins and my twist came apart as I kept eating. Now, I always double-check my toolkit before leaving home.
Step-by-Step: How to Do a French Twist
Let’s get into the good stuff. Here’s how I quickly get a good French twist when time is an issue.
-
Start With Clean, Dry Hair
It’s best when your hair is a little dirty, but if you haven’t done your hair yet, add some dry shampoo or texture spray. It makes sure the pins stay put and don’t come off.
-
Brush Hair to One Side
Pull all your hair up to your nape and move it all to the side. Almost always, I go left, but you should go wherever feels best for you. Keep your eyebrows neat by smoothing them down with a bristle brush.
-
Insert Bobby Pins Vertically
Place bobby pins standing up against your scalp where the center of your head meets. These will serve as the anchor for your twist.
-
Twist the Hair Upward
Twist your ponytail so it is tight as you bring it up toward your head. The tighter the twist, the cleaner the final look.
-
Fold and Tuck the Ends In
Bring the twisted section up and push the ends into the inside of the roll. Use U-pins to secure everything into place.
-
Spray and Finish
Give the whole thing a generous spritz of hairspray. Another thing I do is to run a toothbrush over the system to get flyaways under control.
My Top Tips for a Perfect French Twist
After years of trial and error (and a few twist disasters caught on TikTok), here’s what really works:
- Use texture spray if your hair is too silky to hold pins.
- Don’t over-pin. It can actually cause the style to collapse faster.
- Try it on second-day hair for easier control and less frizz.
- Add padding to create fullness if you have thin or fine hair.
My friend Mia taught me this great trick where she rolls up a hair donut, slices it open, and tucks it inside the twist. It gave my updo serious volume—and it stayed perfect during a 5-hour wedding reception!
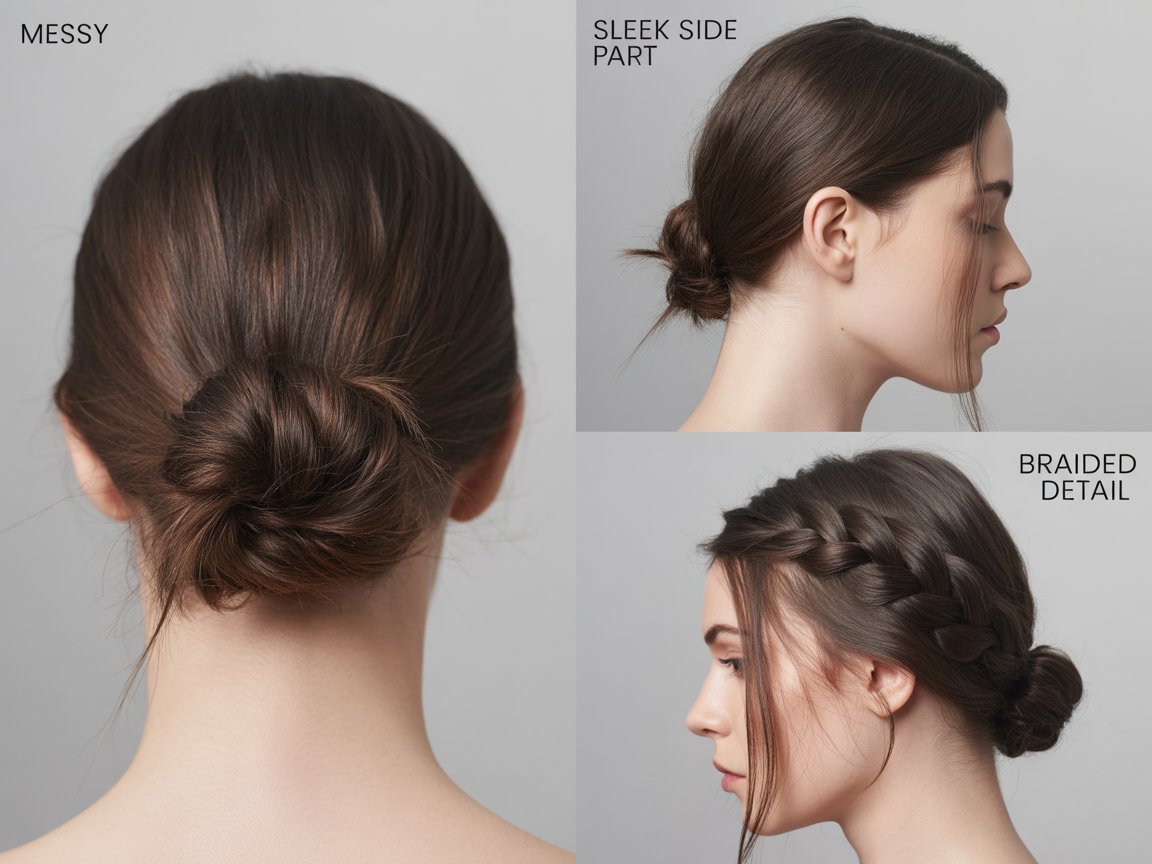
Style Variations to Try
1. Messy French Twist
Looser and more relaxed. Pick out a little hair around your face if you want a sweet, natural look.
2. Sleek French Twist with Side Part
This one’s ultra-sophisticated. Apply some pomade or shine serum at the part and comb it through to straighten the hair.
3. Braided French Twist
Make a small diagonal braid along your hairline and add it to your twist. It’s playful and chic.
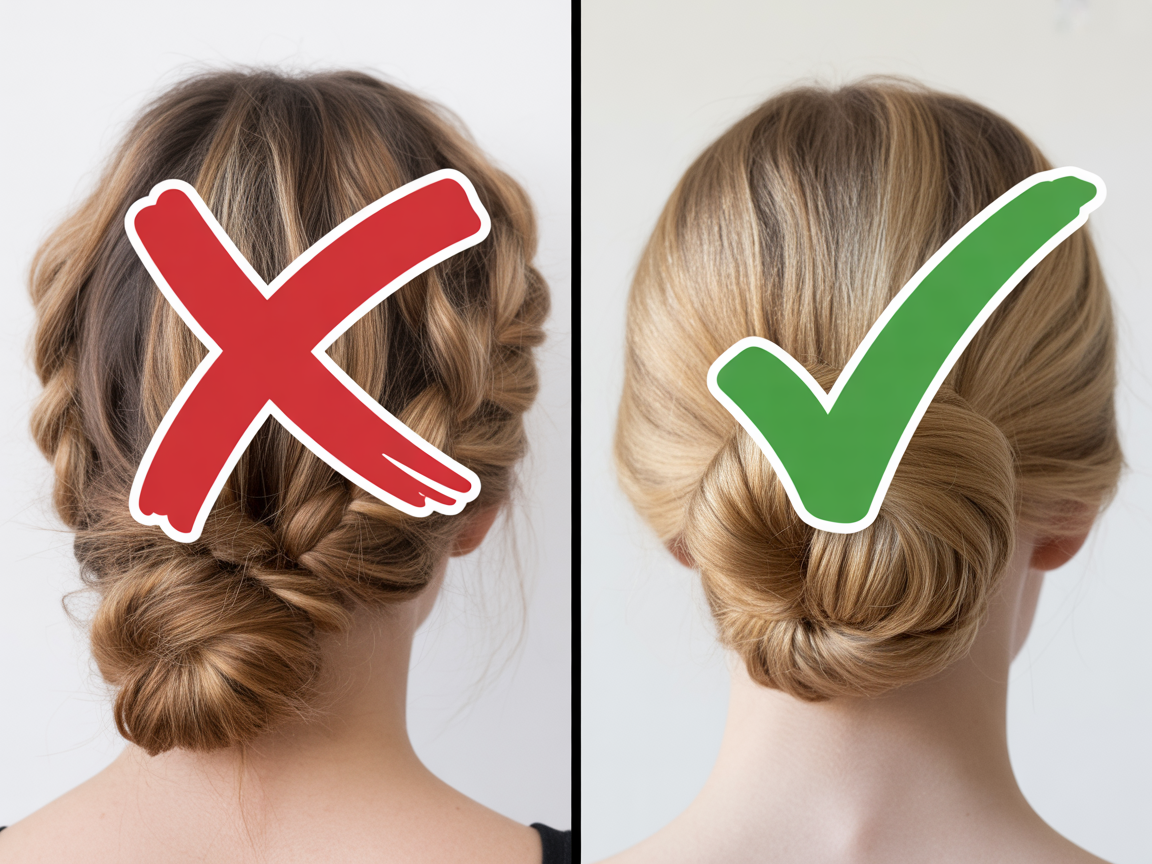
Common Mistakes and How to Fix Them
Here are a few issues I see often (and yes, I’ve made all of them myself at some point):
| Mistake | Fix |
|---|---|
| Twist too loose or falling apart | Use U-pins and secure the base first before twisting |
| Visible bobby pins | Choose pins that match your hair color and tuck them deeper |
| Flat crown area | Gently tease the top section before starting the twist |
| Ends poking out | Tuck ends tightly and double-pin if needed |
Final Thoughts
Here’s what I’ve learned from years of doing French twists in cars, hotel rooms, and backstage at events:
- A French twist doesn’t have to be perfect to look amazing.
- The right tools make all the difference.
- Practice makes it second nature—you’ll be shocked how fast you get.
- You can totally do this, even if you think you’re “bad at hair.”
- It’s a confidence-boosting go-to that never goes out of style.
So tell me—have you ever tried doing a French twist on your own? What’s the one step that always trips you up?