
Have you ever looked in the mirror ready to cut your hair, wondering if bangs are a good idea? I know that moment all too well. A scroll on Pinterest or watching a TikTok video tends to lead us to thinking our hair would be better with bangs.
Trimming your own fringe yourself occasionally makes you look great, but it can also end in disaster! I’ve experienced both. In this article, I’m offering seven tips I’ve used myself or shared with clients to achieve perfect DIY bangs, along with a few stories to watch out for.
If you’re an adventurous spirit, are sick of making salon appointments or just need a new hairstyle on a Sunday night, this post is perfect for you. Let’s do this—together.
Before You Cut — What You Should Know
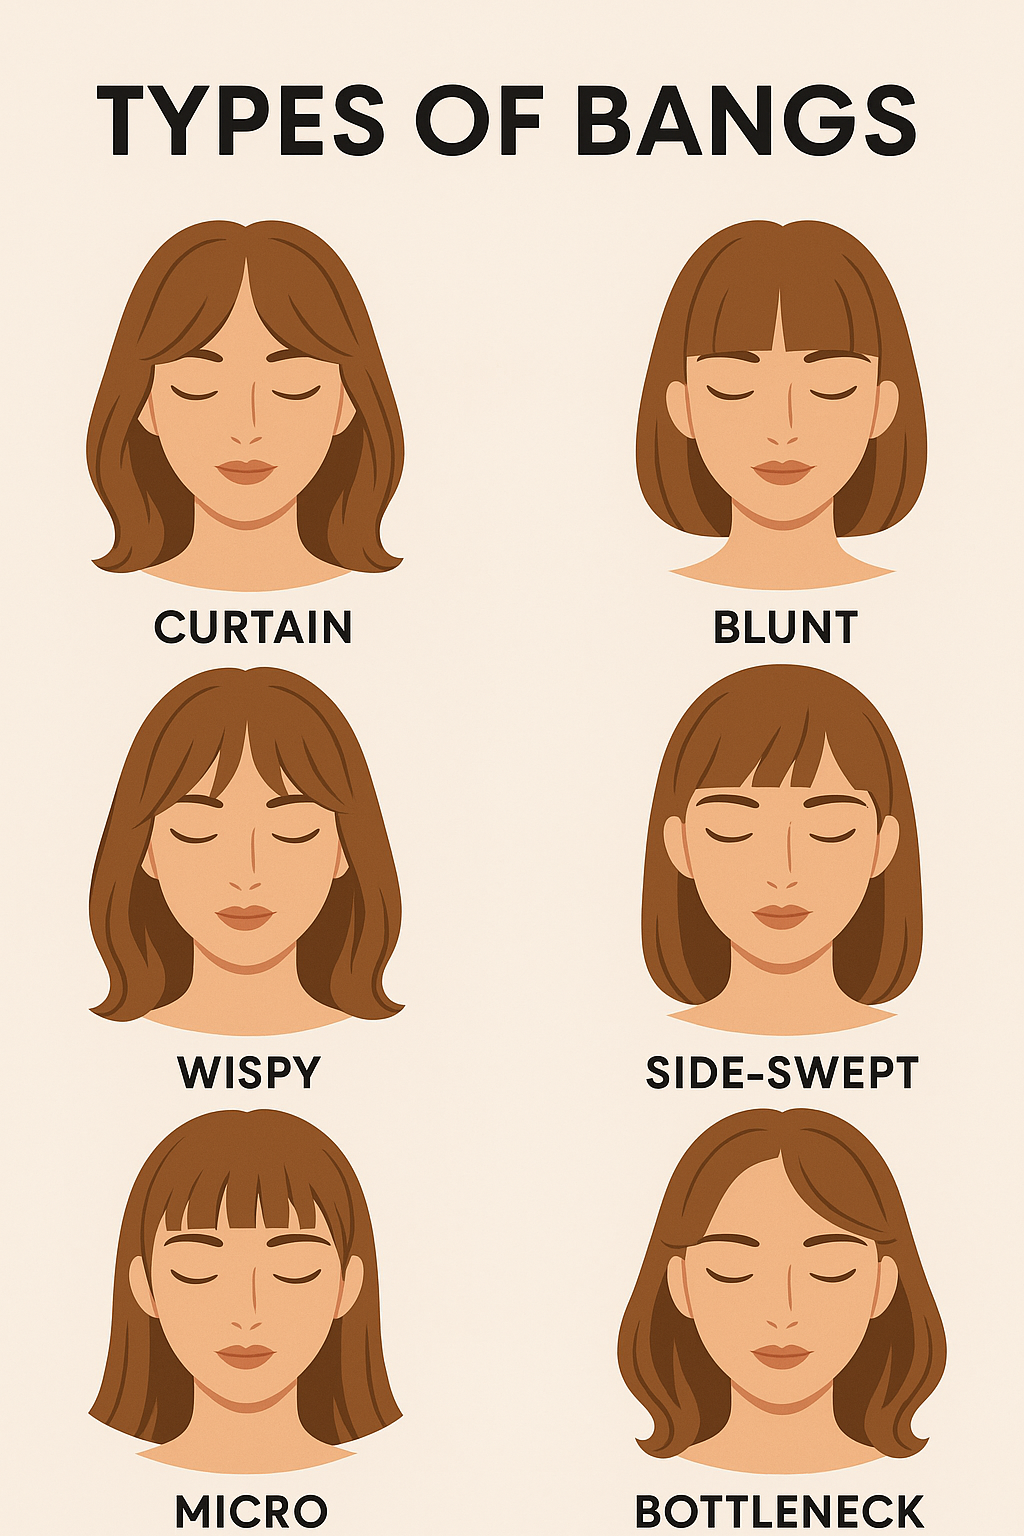
1. Know Your Bangs Style
Not all bangs are created equal. Picking the correct cut for your face size and hair type comes first. Are you into the soft romance of curtain bangs? Prefer the edgy blunt cut? It’s also possible that you’re imagining either wispy locks or a confident micro fringe. Start by knowing what works for you.
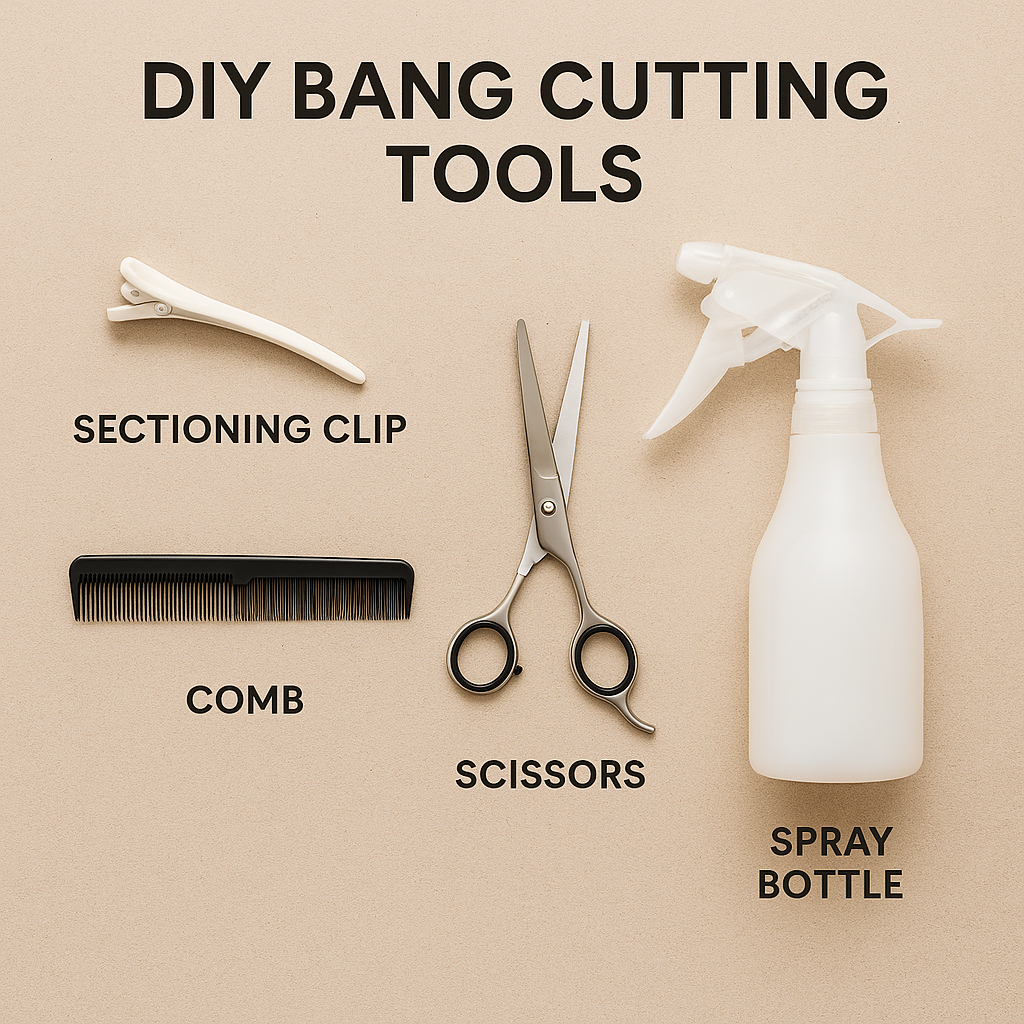
2. Choose the Right Tools
Don’t think that kitchen scissors are on your team. I always rely on professional shears, a fine comb, sectioning clips and a hand mirror to see the back and sides. A spray bottle will be useful if you decide to do your hairstyle on wet hair.
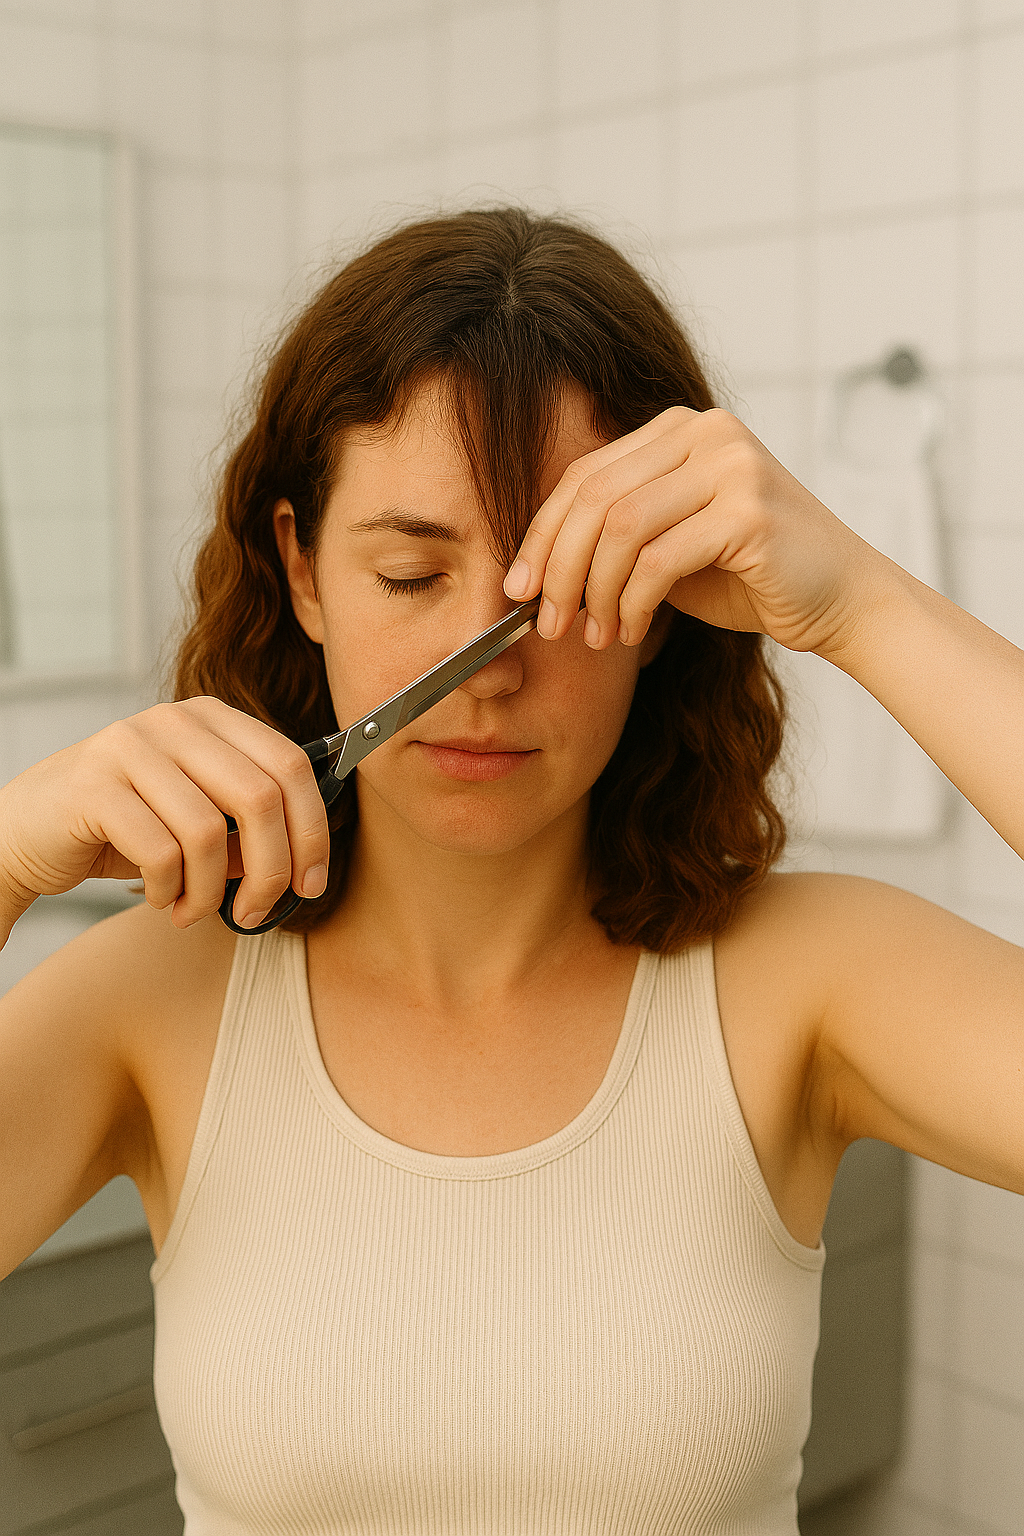
3. Dry or Wet? What I Recommend
Before that day, I always cut my bangs while wet—until I accidentally made them super short. Hair shrinks when it dries, especially if it’s wavy. Nowadays, I trim dry or slightly moist hair so surprises are avoided. Trust me, it makes a difference.
7 Easy Ways to Cut Bangs at Home
1. The Twist-and-Cut Trick
Curly hair users find that this method produces face-framing curtain bangs with the least effort. You bunch together the front section, tighten it in the center by twisting and then cut through with scissors. Short styles are applied in the center and gradually get longer as you move toward the outsides. It ended up saving me from a major breakdown when my bangs got too long, just by doing it once during a beach Airbnb vacation.
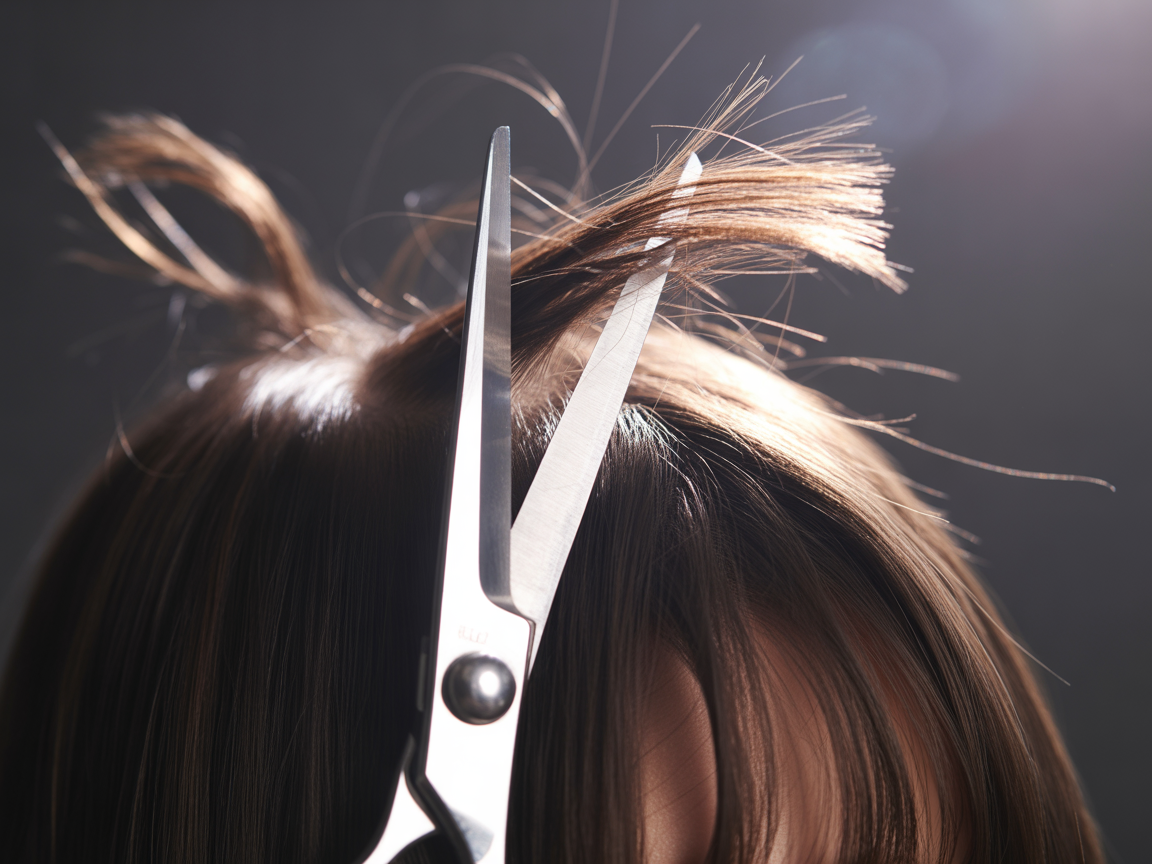
2. Point-Cutting for Texture
Shorn by point-cutting, your hair can achieve a nicely piecey look. Hold the scissors vertically and snip into the ends. It’s great for people with thin or thick hair because it smooths out the look rather than sharpens it. I often use this with people who prefer movements and aren’t in a rush to dry their hair with heat.
3. Blunt-Cut Technique for Sharp Edges
This one’s for the bold. A straight and blunt fringe is a sweet and chic look—as long as it’s done the right way. Starting out, my approach was not well-organized due to uneven sectioning. Now I always triple-check alignment before cutting. Tip: cut longer than you think, then adjust.
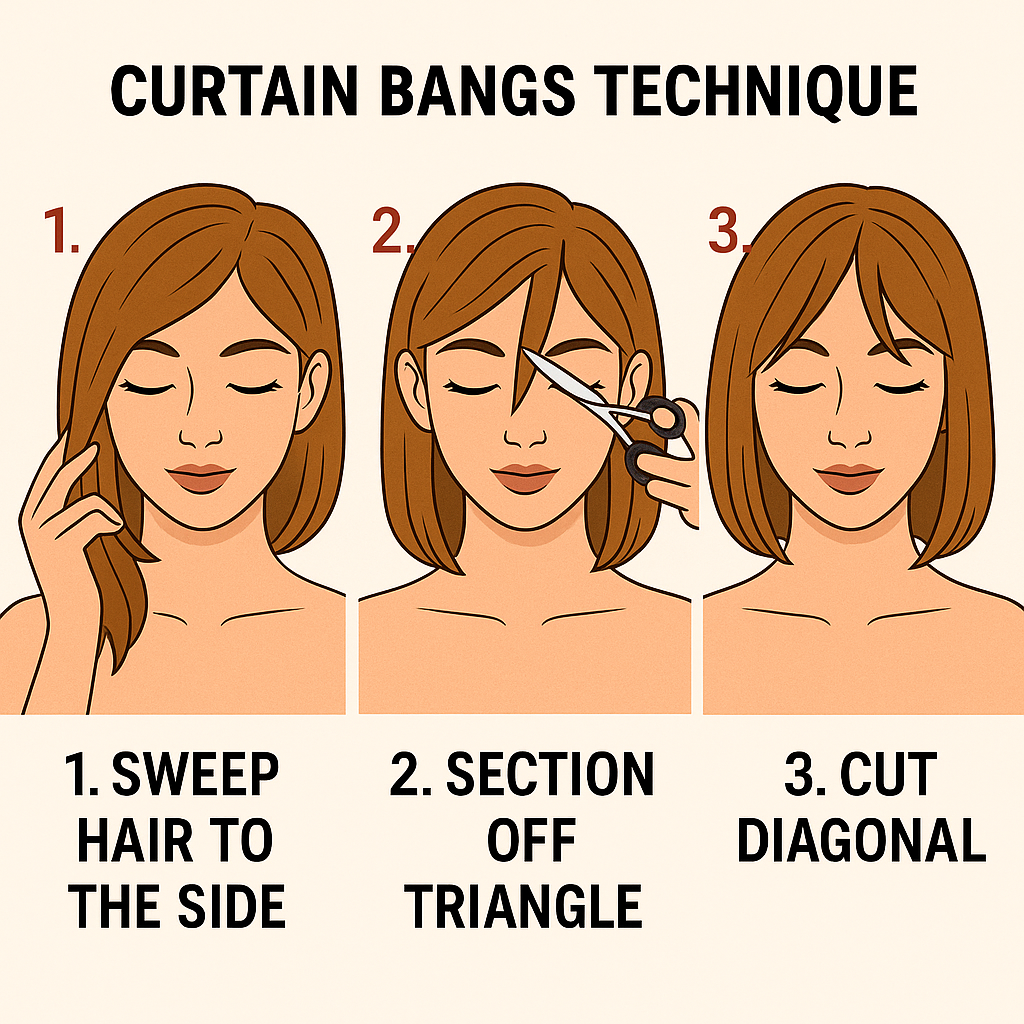
4. Curtain Bangs with a Center Split
There’s good reason why users keep loving curtain bangs—they are flattering for most hair styles. Begin with a middle parting and then snip your hair downward on an angle for a curtain effect. Blend into the sides for a natural transition.
Here’s a quick step-by-step:
- Sweep your hair to the side in step one and in step two, section off a triangle up front.
- Try to cut the front diagonal, making sure to move the blade downward from the most centered part as you go out.
- Use point-cutting to soften the line.
5. Side-Swept Bangs Made Easy
If you’re not confident about shortening your hair, this style is just what you need. I caught this from a lockdown TikTok tutorial and have loved it ever since. Make sure to trim more than required and keep your scissors cut the hair lower as you start curving toward the side for a better fit
6. The Triangle Section Method
Divide your hair at the forward section of your head to form a small triangle. Doing this helps you manage their volume and stops your bangs from becoming too thick. Anyone new to editing will find it easy to create results that look clean and neat.

7. The Bang Trim Refresh
Already have bangs? Every 2–3 weeks, trim only a little bit to keep your hedge neat. I like to use a dry cut and I illuminate my work by a window. Snip lightly and often, rather than big dramatic cuts.

Mistakes to Avoid When Cutting Your Bangs
Don’t Cut When You’re Emotional
I can’t stress this enough. There’s no reason to get bangs just because you feel upset or frustrated. One week when my stress got too much, I impulsively cut and wore a beanie for more than four weeks out of shame.
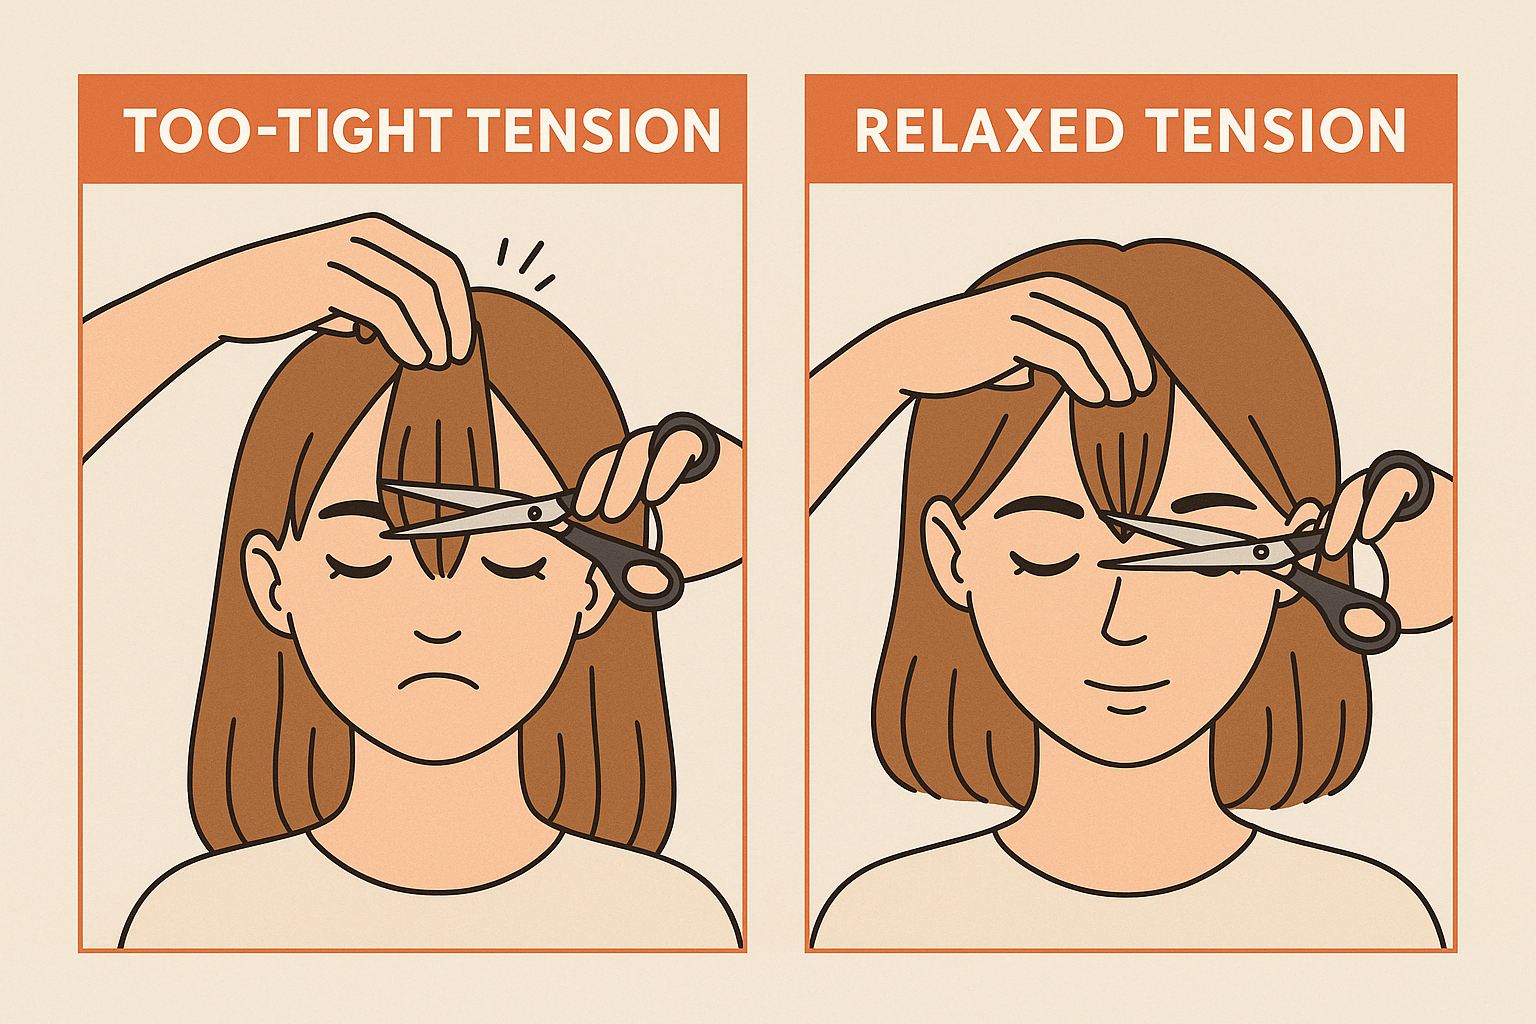
Watch Your Tension
Stressing the hair too much while cutting may clear result in the hair shrinking. Keep the tension soft and natural. If you don’t lift the hair up, it will settle down much closer to your head, especially if your hair is wavy.
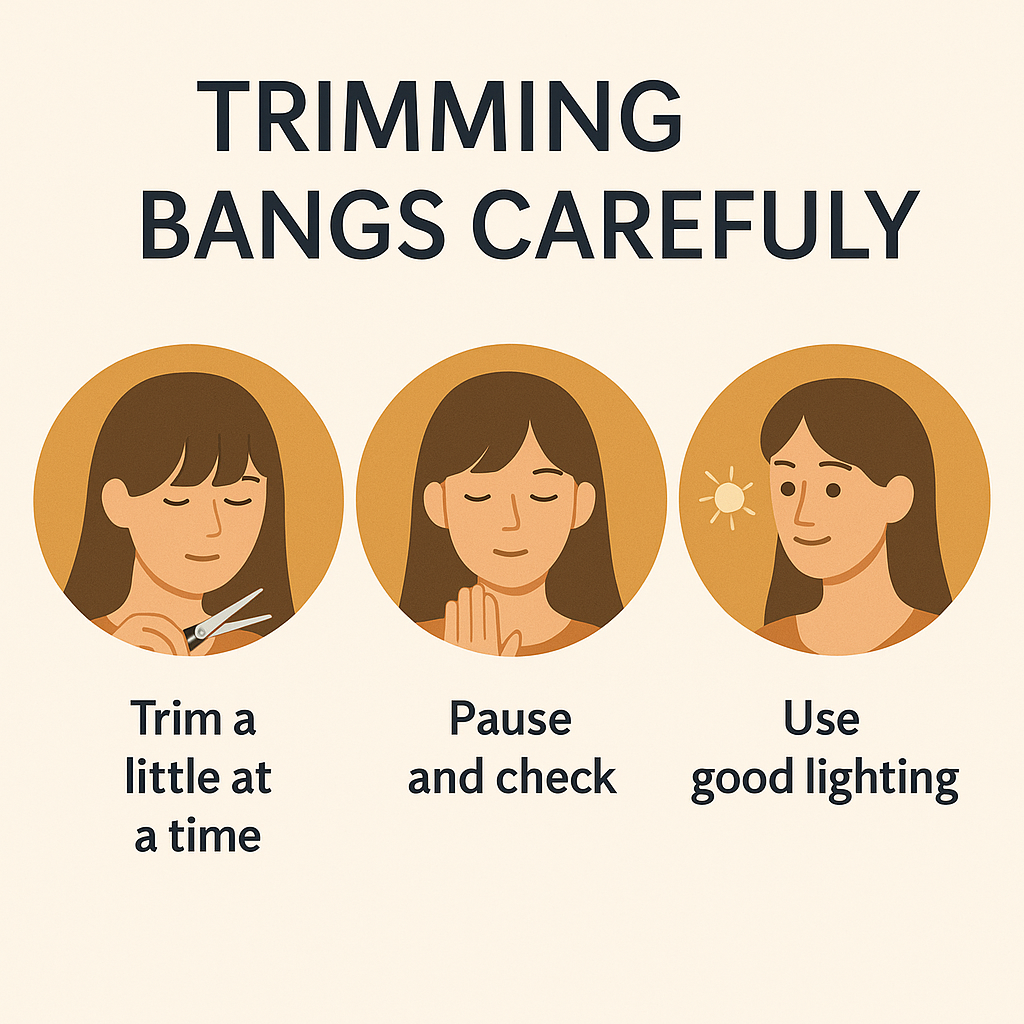
Cut a Little at a Time
This may sound obvious, but it’s easy to forget in the moment. Always start long and snip bit by bit. Check from different angles in the mirror as you go.
- Cut no more than 1/4 inch at a time.
- Pause and assess after every few snips.
- Use natural lighting to double-check your work.
How to Maintain Your Bangs
Trimming Schedule
To keep your bangs looking fresh, trim them every two to three weeks. I like to do mine on Sunday evenings while catching up on podcasts—it’s kind of a ritual now.
Styling Tools & Products
Depending on your bang type, different tools work best. Here’s what I recommend based on experience:
| Bang Type | Styling Tool | Tip |
|---|---|---|
| Curtain | Round brush | Blow-dry outward and away from face |
| Blunt | Mini flat iron | Curve slightly under for softness |
| Wispy | Texturizing spray | Use dry for airy lift |
Final Thoughts
- Start slow—bangs are a commitment, but not a crisis.
- Work with good light and better scissors.
- Watch a few tutorials before your first snip.
- Trust yourself, but know you can always fix it or grow it out.
What about you? Have you tried cutting your bangs at home, or are you thinking about it? I’d love to hear your experience—leave a comment or pin this for later!